
My background with wearables1 Research1.1 Unexpected validation1.2 Our vision is not the best1.3 Why not stick their face to where it belongs?2 Tinkering2.1 Emotions stay below the mask2.2 The most basic button 🔘2.4 Cyborges'que - Muscle sensors 👽 2.5 Emotion trigger - Is there any more simple way?2.6 Giving feedback to the user2.7 Addressing external sensors & components with Tramontana + P5.js2.8 Tramontana with Processing2.9 Other approaches of using external sensors and components3 Design & Build3.1 The first prototype3.2 Hooking up the buzzer3.3 First prototype in action3.4 User testing & Feedback3.5 Final prototype 3.6 ESP8266 based mask-extension 3.7 ESP8266 Webserver3.8 Vision / Next steps4 Reflection5 Revision
During the introductory lecture it became more clear, what this entire course was about. Already in "Project: Shared Spaces" I tried persuading my group to tinker more on an interactive IoT level, rather than just creating yet another App. Technology is changing and so is society: There are studies showing that the mere oversupply of apps results in the opposite: A demand to use less applications and go back to basics.
My background with wearables
When I first used my smartwatch in 2015, a Moto 360 the benefit was clear: It is an extension to my phone. I was hoping to use it primarily for bicycle navigation back then but it never really worked out, because the watch was not always in sight during the ride and it seemed even easier to get the phone out of my pocket.
The next step came with Amazon's Echo device, which I equipped my home with in 2017. This device has been blowing my mind for the last years and basically allows interaction solely based on voice. I concluded:
“The best interface has no interface.“
This is not entirely true however - Amazon's Echo devices use strong LED lights to transparently show their status. Having the combinaton of voice and light involved in the interaction, where light is embedded in a round LED-ring, that might be aimed to reflect a human's face, stimulates the impression the end user naturally talks to a human. Emotions and states are thereby displayed with different colors (Blue, Green, Red, Yellow), furthermore the user is able to see, whether the device is listening or not. Although not all Amazon Echo devices are wearable, I wanted to mention them as they basically achieve the same we might want to achieve with wearables: Offering a service / interaction in motion. As it is not required to wear these devices, nor to hold it in the hands or have direct eye contact, I would somehow put them in the wearable category but at the same time give them their own category.
1 Research
What would a world be without smiling and nonverbal human-to-human communication? With the introduction of Face masks in Germany, they swallowed our faces in public spaces. But how might we still maintain human behavior when we can’t perceive us as humans anymore in the street, during a commute, while at the supermarket?
During the current time it is particularly important to keep on smiling. I am convinced that masks, as they are currently available on the market, are not capable of doing that and might, on the long run lead to dehumanization and in the worst case, to war.
- Emotion for mask? - How many smiles did you give today?
- Receive distance-warnings
1.1 Unexpected validation
I always wonder, whether projects can have a real use or I perceive problems the same way as other people do
When I started writing this text, I had no real proof whatsoever whether other people are experiencing the same problem with facial masks at all. However, a few hours later, I had my proof: This news post deals with a Hotel company in Berlin-Kreuzberg, that apparantly faced the same problem.
Emotions particularly interesting for service-orientated branches
Now I realized, that this is potentially not just a problem for every citizen but especially for "service-first" companies such as restaurants & hotels, where employees often go through years of studies with the objection of learning how to behave friendly 24/7.


The Hotel came along with the idea to print buttons of their smilng employees so they could stick it on their chest and finally greet their guests wiith a smile again.
But why on the chest? As a UX designer I am always curious on how interaction happens under real world conditions.
1.2 Our vision is not the best
Ever in your life knocked your head on a shelf, the roof of your roadster? The first issue I would see in using buttons placed on the chest is more from visual nature: We ourselves might consider our vision as completely sharp. This however is just true half the way. The anatomy of our eyes is actually quite restrictied, meaning that the perceived sharp part of our vision is very small, while the unsharp (peripheral vision) is very wide-angled and allows us to detect fast movements. Although this would probably require more extensive testing, I would conclude that using buttons on your chest is not visible to everyone.


1.3 Why not stick their face to where it belongs?
I see two constraints in here:
- Restricted breathing abilities through covering the mask with an airtight object
- Restricted mask functionality caused by the button puncture
Going back to the identified challenges of "mask-extending" products, I found that both breathing and mask safety might get restricted by placing an object / device in front of your face.
2 Tinkering
The challenge I attempted to pursue was clear for now and basically consisted of two parts.
- Display emotions 😊😡 through a mask.
- Measure distance and give a warning ⚠️ / some kind of feedback whenever the distance is below 1.5m ☢️
2.1 Emotions stay below the mask
Just a quick reminder on why I am building this. In this GIF clip you can see me in two states.
- Normal 😐
- Smiling ☺️
But do you actually?

.gif%3Ftable%3Dblock%26id%3Da67e9a15-686f-4e34-83f2-14a90f2bf9bb%26cache%3Dv2&w=828&q=75)
But how would someone trigger these emotions? The probably most simple forward way would it be to press a button .
2.2 The most basic button 🔘
During the workshops I got to explore different ways of input. The basic button was one of them. While this button might work great embedded in a surface , e.g. as fire alarm or on a nuclear power plant dashboard, this primitive part would be rather unsuited for triggering an emotion due to inaccessibility in a mask - although the button with red enclosure is way more accessible than the bare-bone button.
2.3 Joystick for joy? 🕹


I was looking for a somewhat more accessible button that might also be triggered by using other parts of the body. In the Arduino kit I found the almost forgotten joystick I was testing it during the last workshop alongside the servo sensor (Workshops : Arduino ) . It can basically reflect different directions on X / Y axis + a button click. This might be handy to work with even with e.g. your neck & shoulder. (Up & Down to trigger different emotions)
But wouldn't it be great to trigger your wearable device completely hands-free?
2.4 Cyborges'que - Muscle sensors 👽
Just reflecting the movements of your face muscles and translating it into emotion pictograms on a screen might appear to be the most logical approach to follow. However as you can see in the video, the sensors need to be installed on your body before usage - but are then able to deliver really precise output data.


Next idea I had was modifying the mask with a magnet sensor, which triggers as soon as it detects a change in the force field. This approach however is less likely to work with different face shapes and (single-use) masks.


Another approach that looks feasible is a conductive rubber cord that could become part of the modular part sticked in front of the mask. Webbed into a hook-and-loop fastener it could then detect "extending" movements of the mask and trigger the according emotion.

2.5 Emotion trigger - Is there any more simple way?
When thinking further I remembered Kerstin, a jolly lady we met in Tanzhaus, a Frankfurt based techno club back in 2014. It was 4am in the morning and whatever approach she was following - her constant smile inspired us to do the same.
So what if the output display would be constantly outputting a smiley face (e.g. when detecting a distance below 10 meters and just switch over to an angry face when getting below 1.5m? I decided to follow this simplified yet functional way for now. Because whoever would be interested in such a product would probably not bother to smile constantly.
2.6 Giving feedback to the user
What kind of feedback could be handy for the user? Visual ? Audio? Physical?
As I did not find any vibration motors flying around and I already explored the functionality of my piezo buzzer, the next step would have been to hook up a proper speaker.
I saw other YouTubers harvesting old devices for components - and that was my plan basically. So I desoldered the speaker from an old defective alarm clock in the hope being able to easily use them in my project.


Eventually however I found that the speaker would either require an AMP module or extensive wiring lacking the ability to tune very loud after all.
So I decided to stick with the piezo buzzer for now that would give an acoustic signal whenever the ultrasonic distance sensor reports a distance below 1 meter.
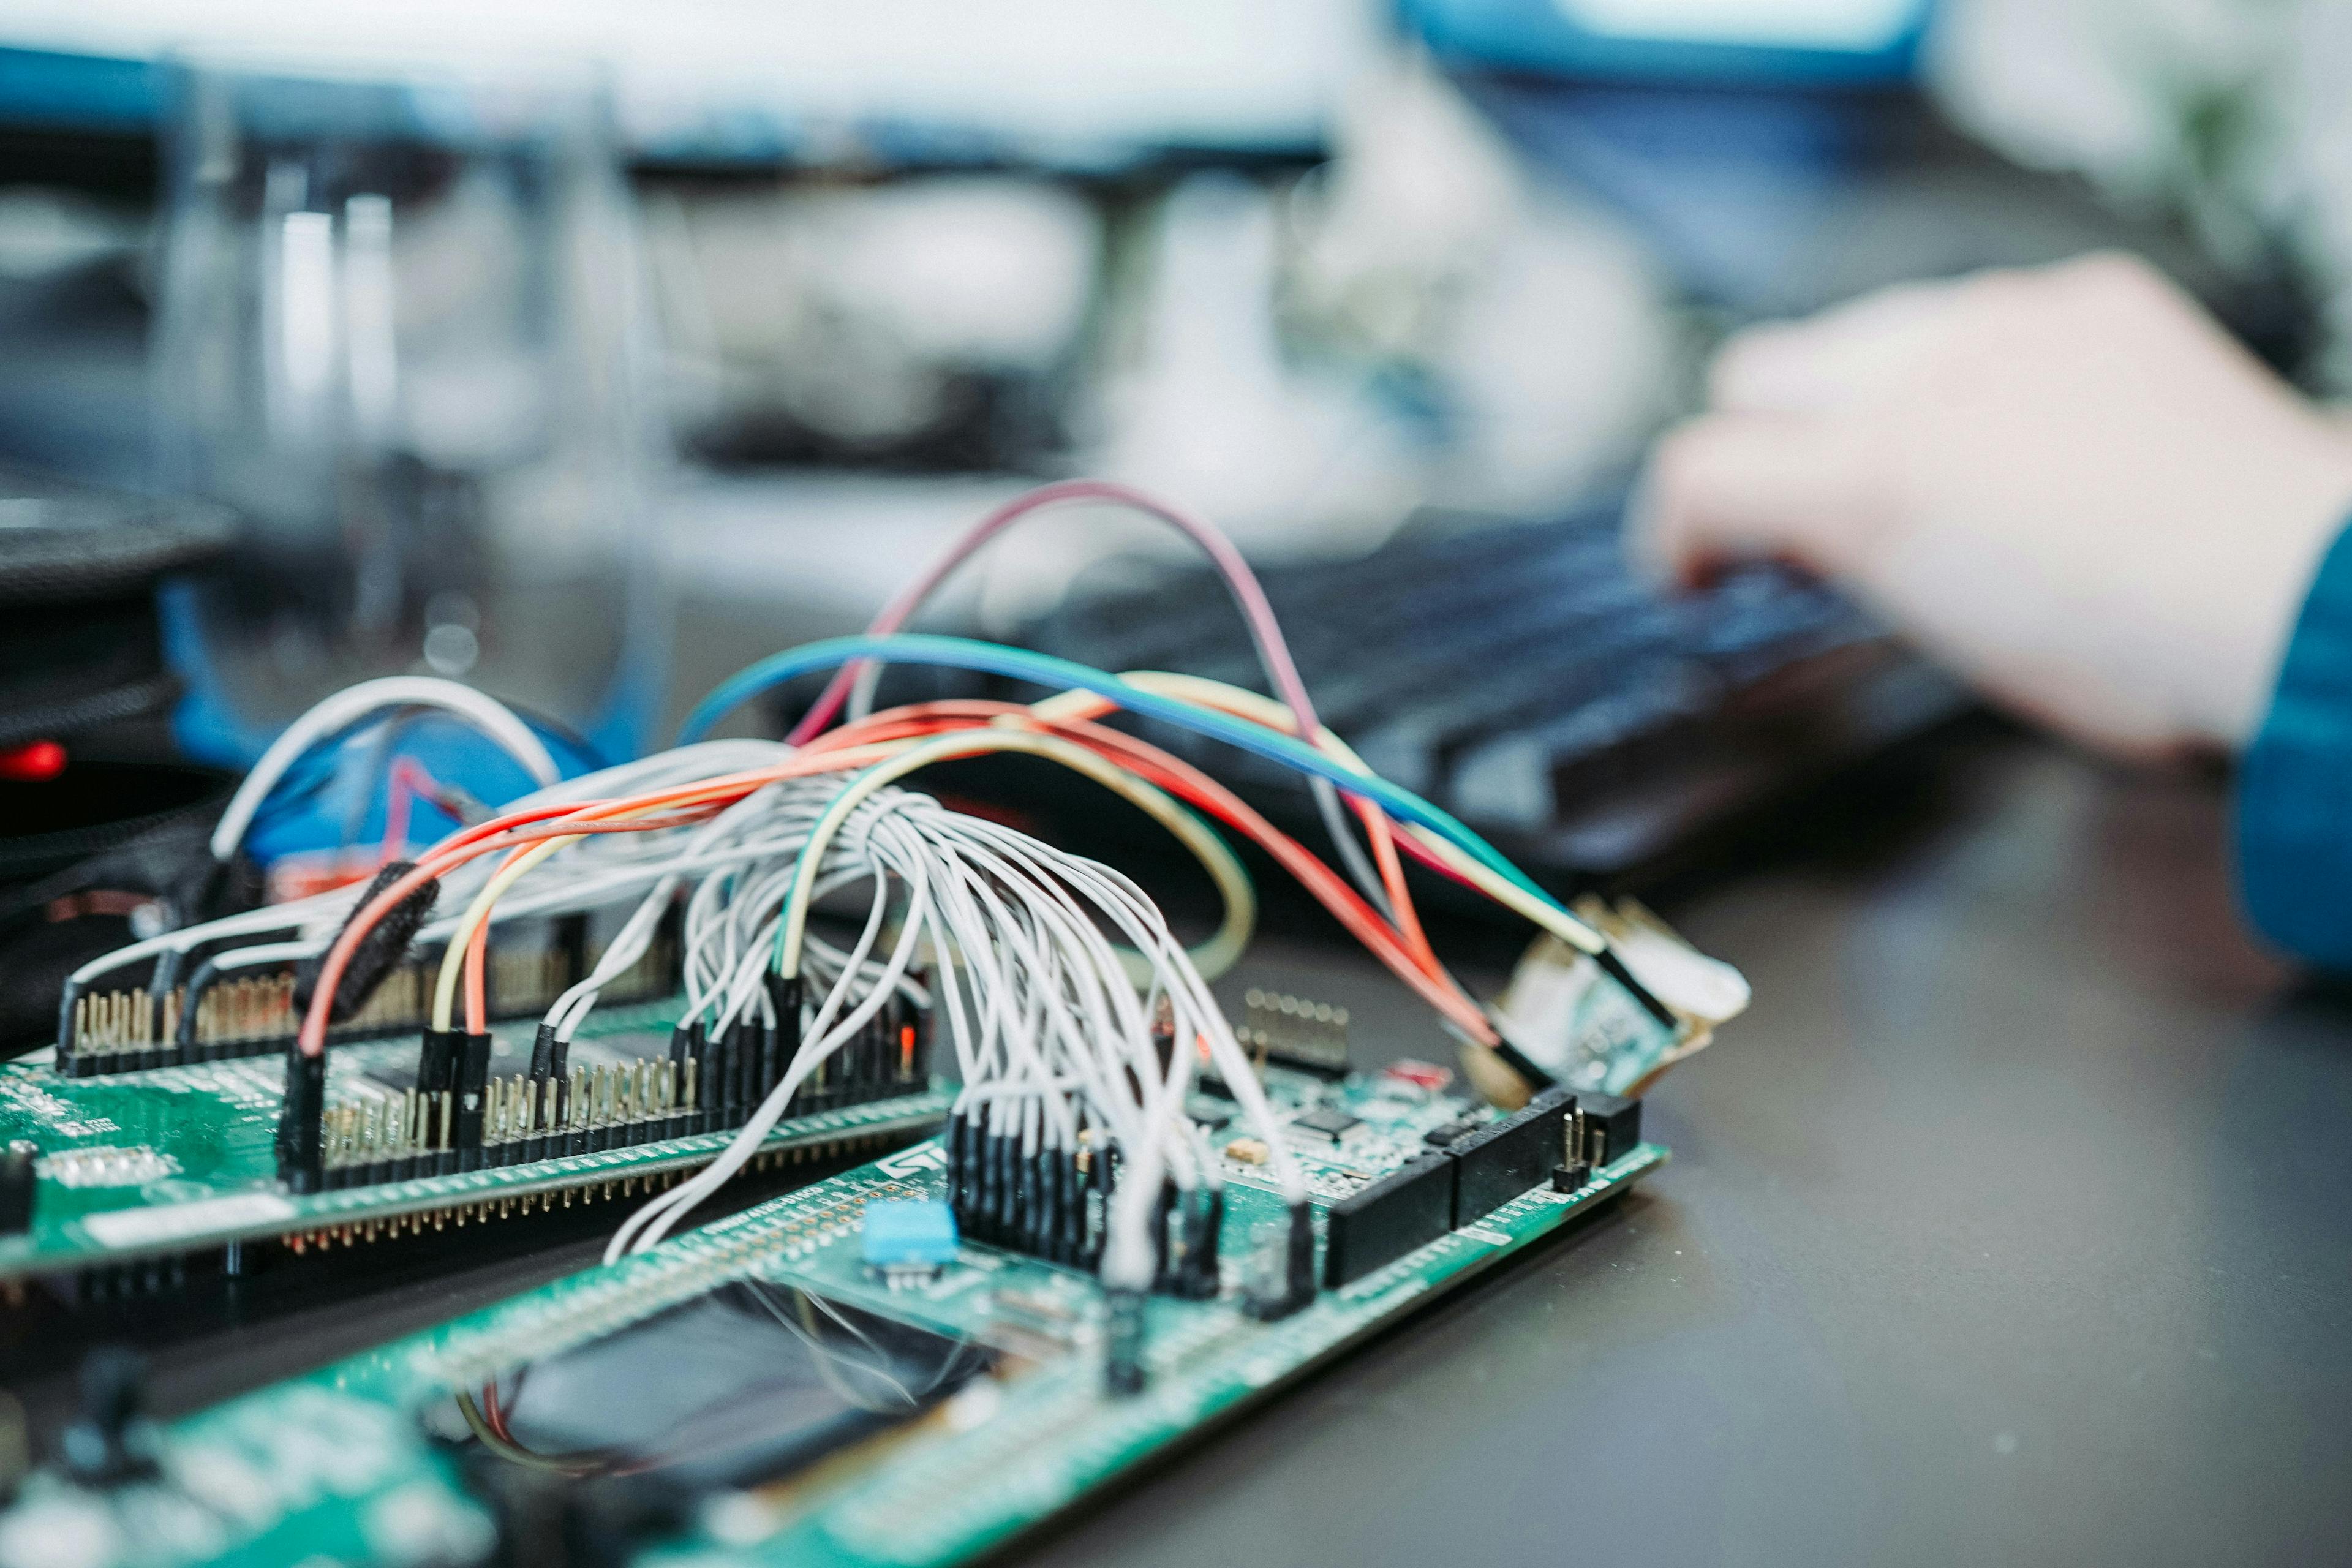
2.7 Addressing external sensors & components with Tramontana + P5.js
I decided to learn more about tramontana in combination P5.js (as I worked with Processing and pure JavaScript before) . The P5.js team however decided to take their site down due to the incident with George Floyd, which I do respect 🏴 and thus decided to continue with the Processing approach.

2.8 Tramontana with Processing


After a few timeout and errors I figured out a bad network configuration and suddenly I was able to connect. But the vibration command did not yet work out of the box. The cause? My phone was on silent mode. Suddenly everything seemed to be working - even the gyro-sensor.
.gif%3Ftable%3Dblock%26id%3D3783a6bc-04c5-4561-a5e6-100984cd4973%26cache%3Dv2&w=828&q=75)
2.9 Other approaches of using external sensors and components
Although it is really nice to see how already existing sensors can be leveraged in IoT projects, for my project using Tramontana would not be feasible as the app would require to be running in the background and the processing sketch does not restore when the device drops out (neither would the javascript).
Furthermore it would require to carry your laptop along the way when going grocery shopping, just to trigger the vibration.
But what if I could connect my ESP1866 directly to my phone using WiFi? I also had a brief look on Webthingify by Mozilla (https://fossdroid.com/a/webthingify.html) and might look into combining both options or something that comes close, at least for my final project where I might use the ESP32 with more options such as Bluetooth Low Energy (BLE).

3 Design & Build
For this project I decided to start with the distance measurement I already experimented with during the workshop and extend it further to give both audio and visual warnings.

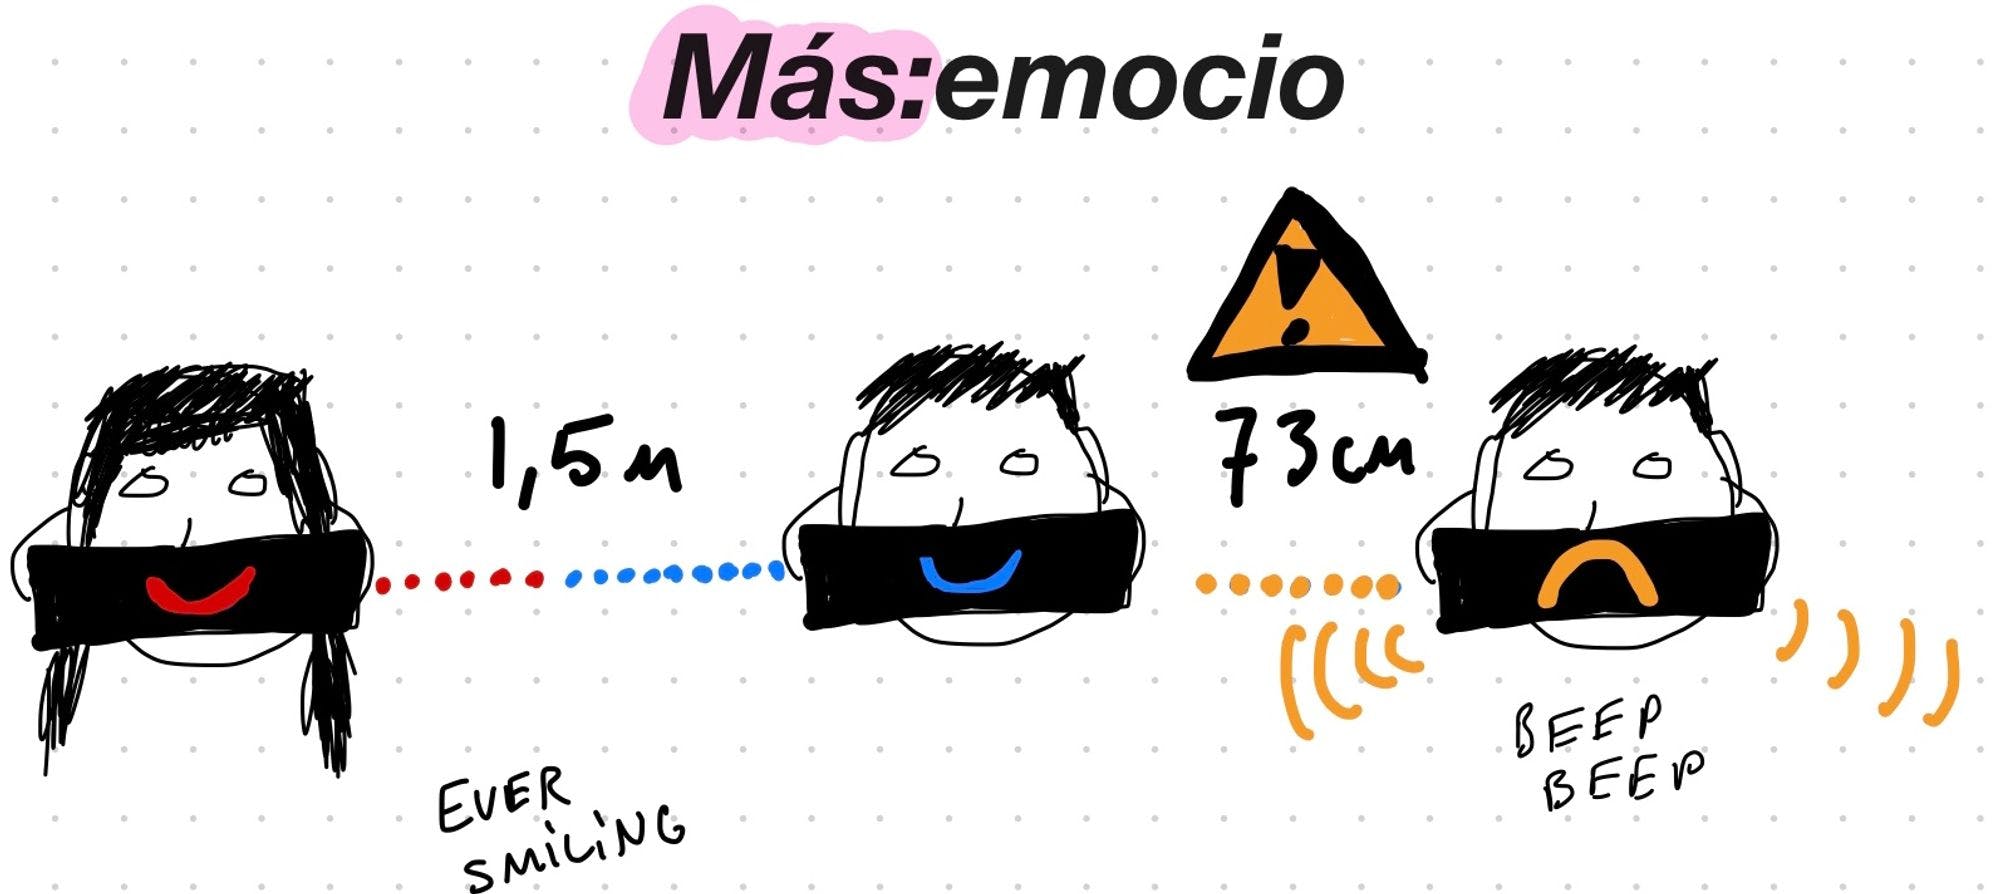
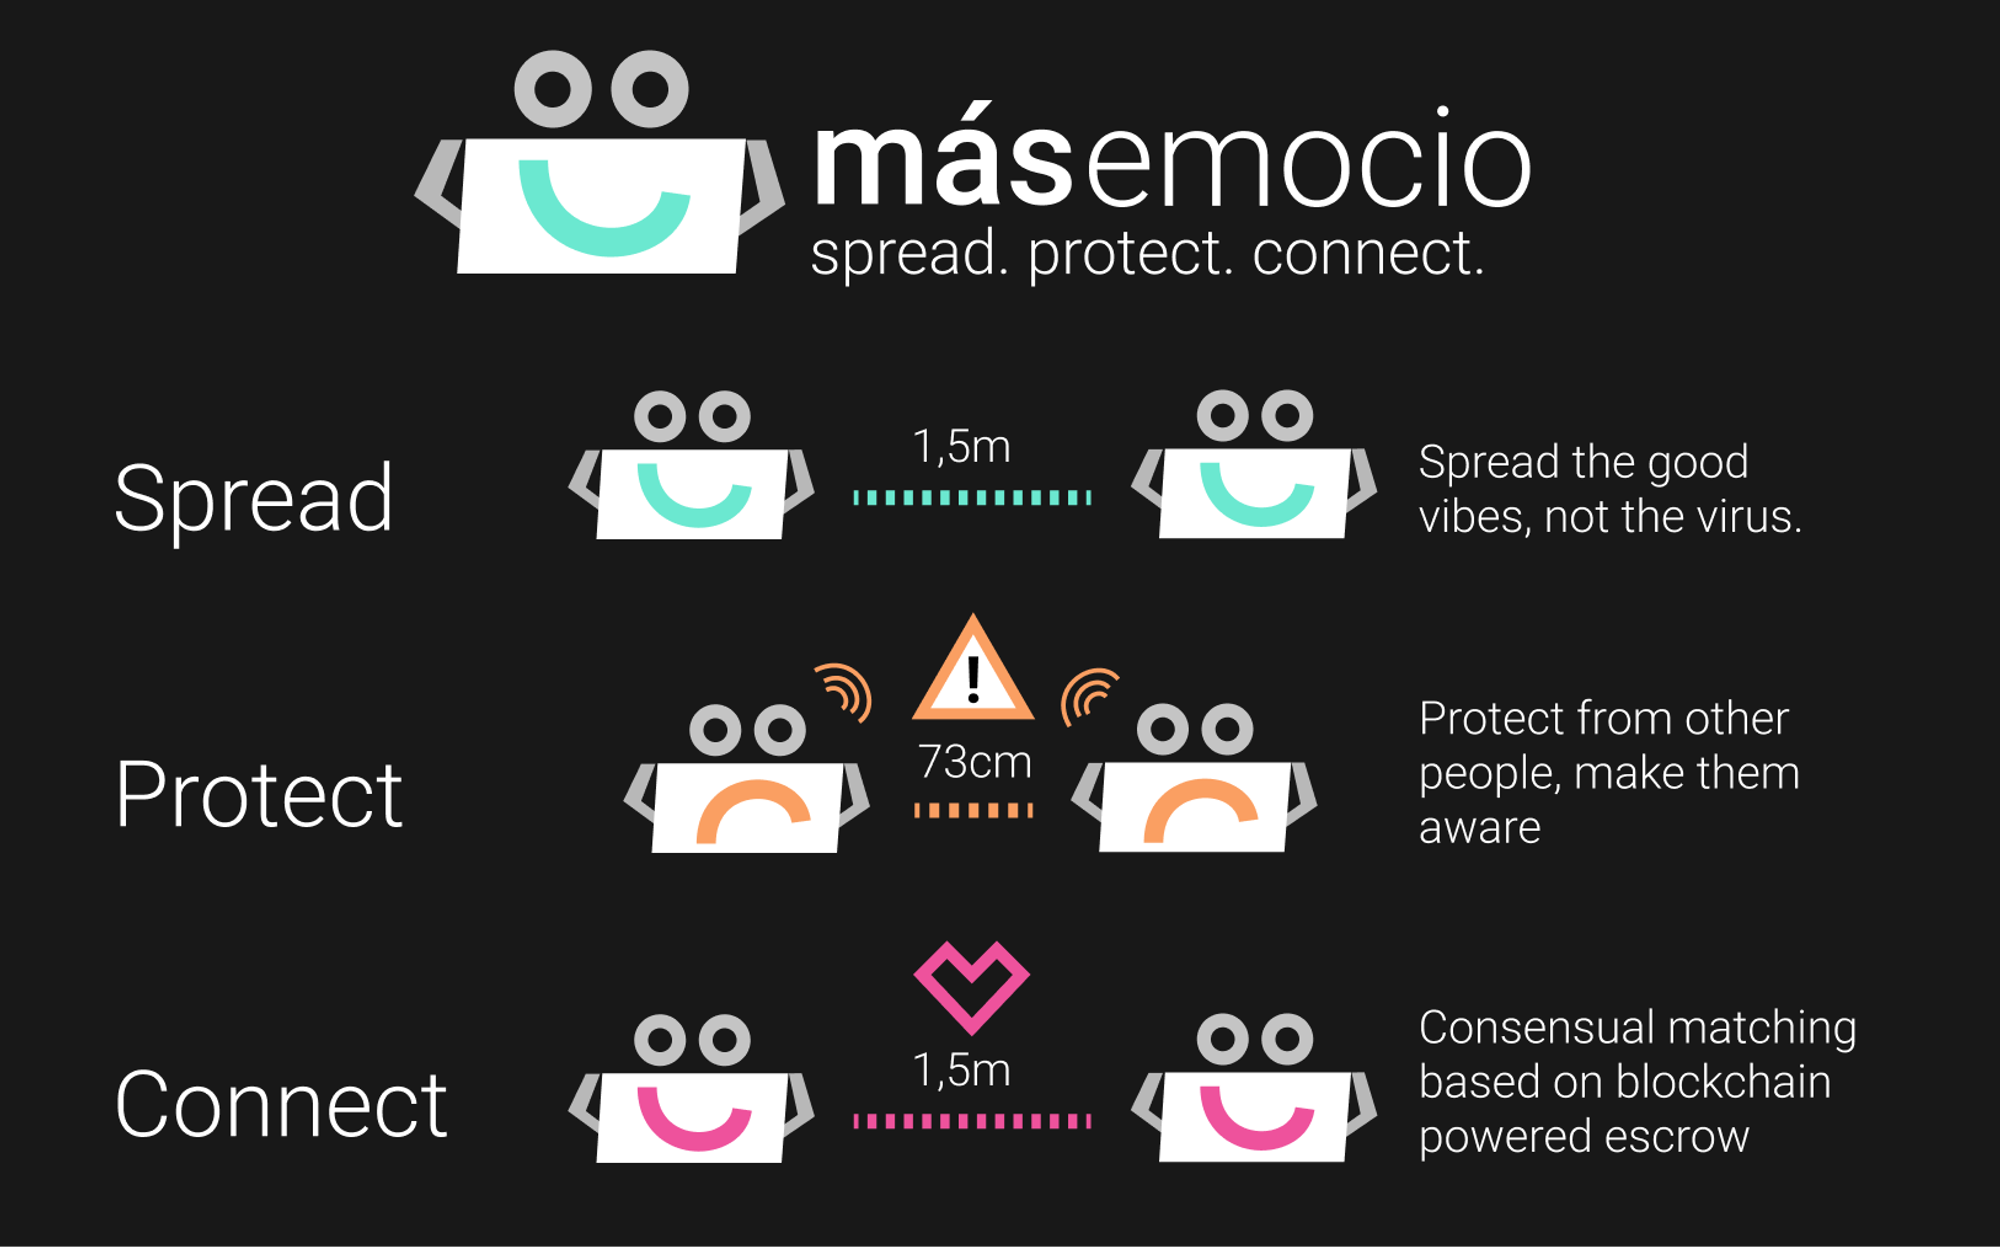
Másemoc.io - Spread. Protect. Connect.
Choosing Másemocio as name follows two logics here. Phonetic-wise it is not far away from emotional mask but actually más is the Spanish word for “more”, while emocio is the esperantic word for “emotional”.
The slogan “spread - protect - connect” was chosen to emphasize in the spread of positive vibes, the yet protective function and the connectvisual and aspect follows a potential vision to use a registered contact with another user to create a meaningful connection.
Adding the alarming beep sound added another sense to other sense to mask, although a vibration sensor might be more discrete.

3.1 The first prototype

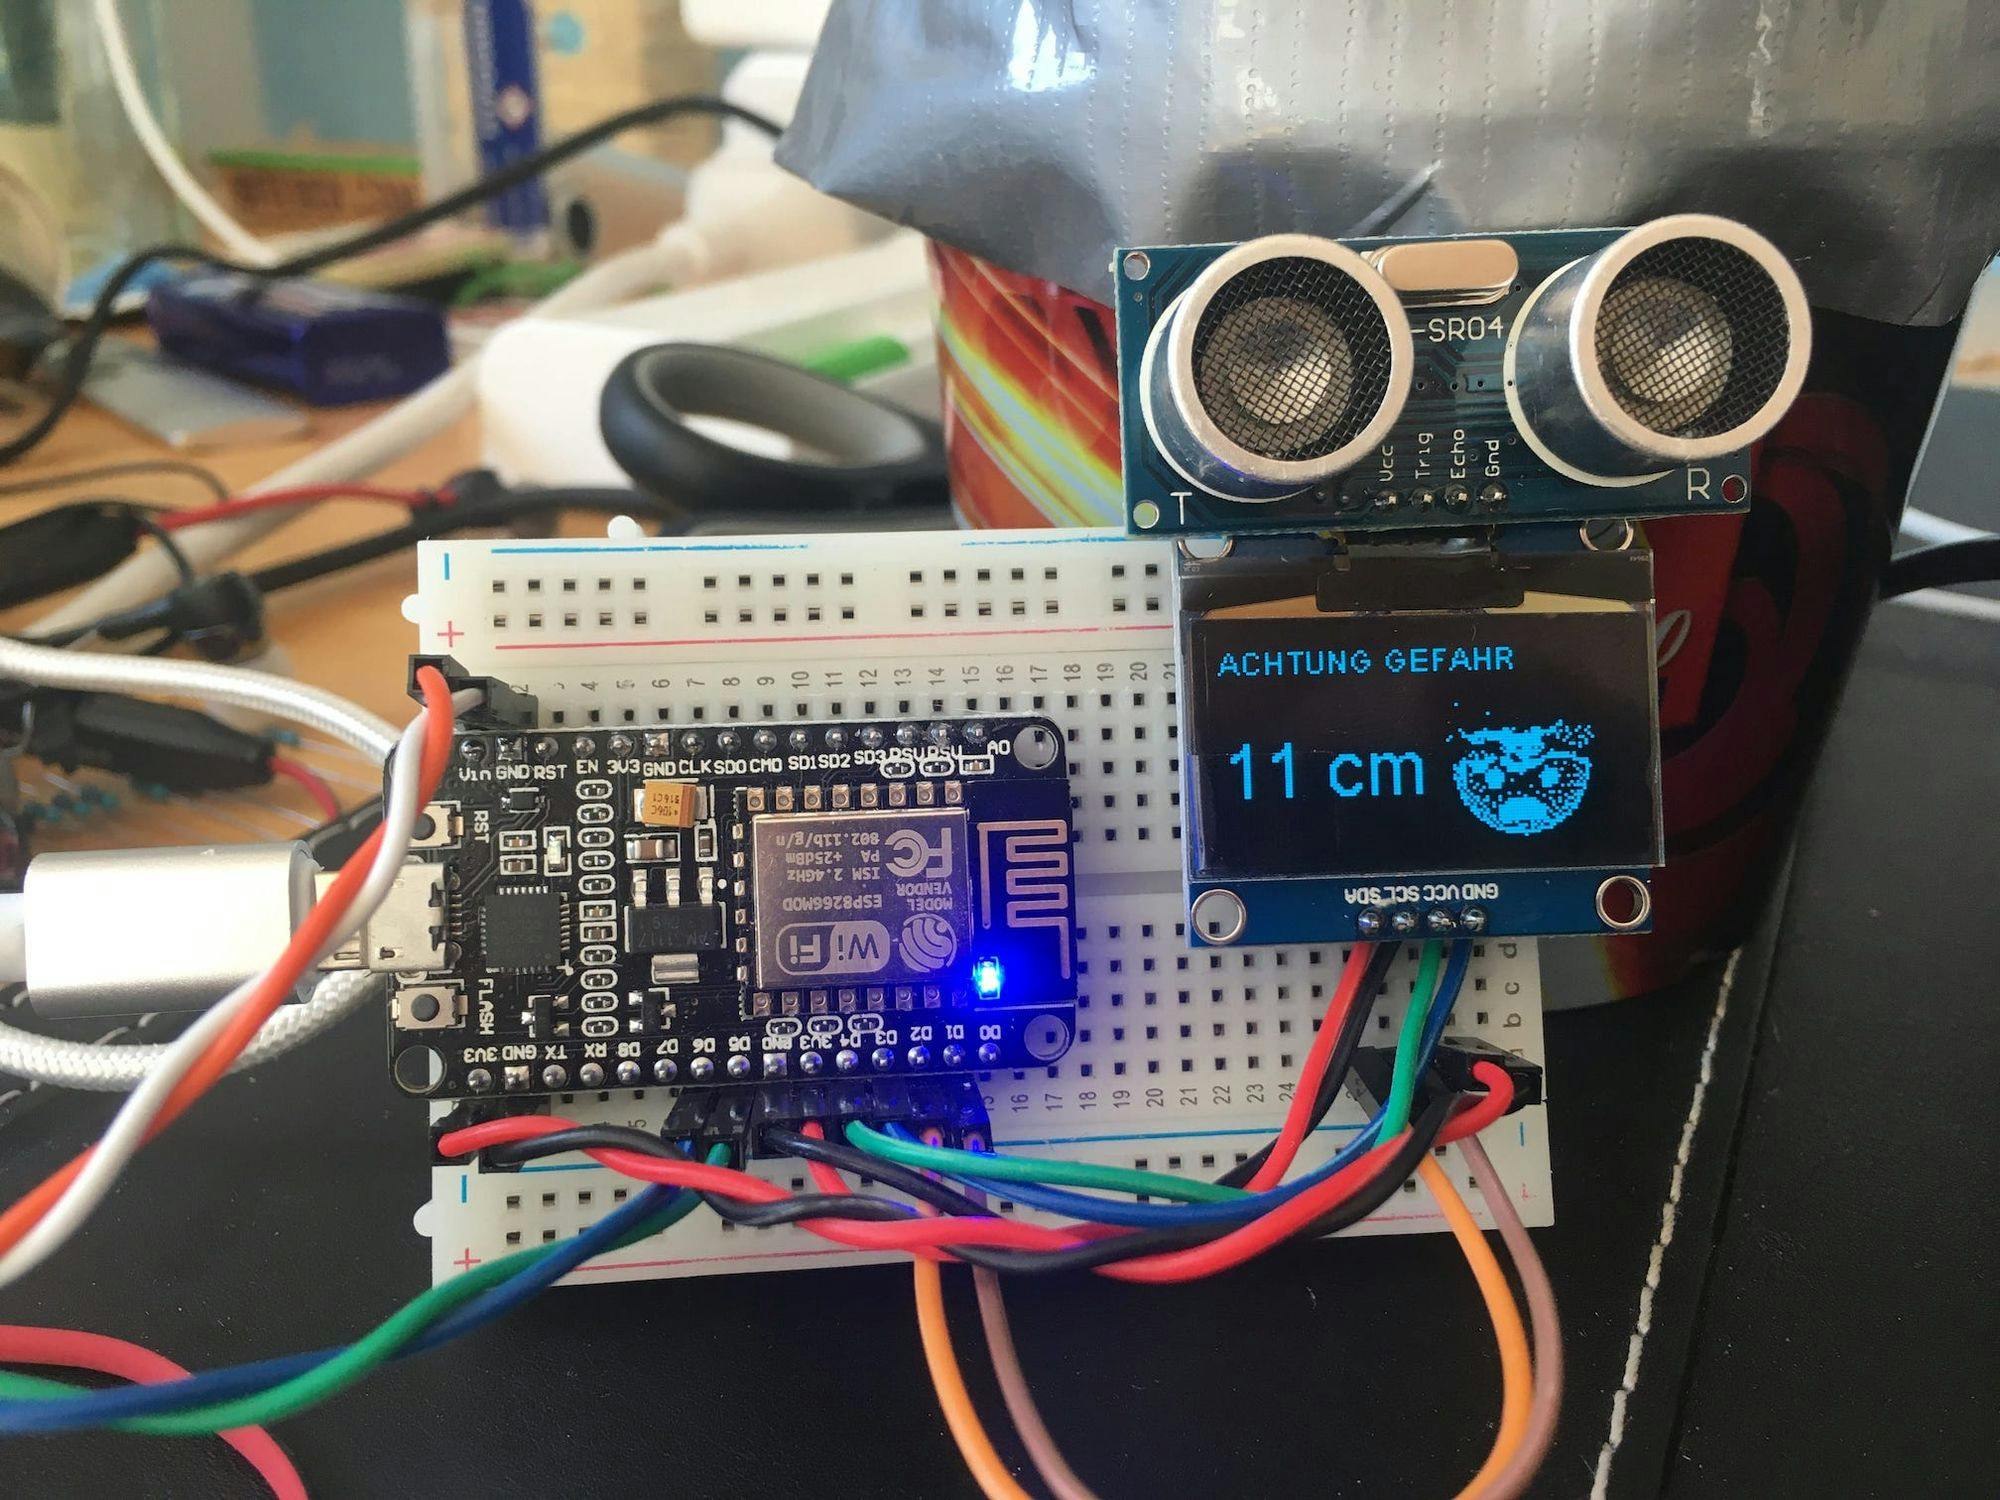
For the first prototype I decided to use a NodeMCU with OLED screen and distance sensor attached.
Working code
#include <ESP8266WiFi.h>
#include <ESP8266mDNS.h>
#include <WiFiUdp.h>
#include <WiFiClient.h>
#include <ESP8266WebServer.h>
#include <ArduinoOTA.h>
#include "images.h"

// For a connection via I2C using the Arduino Wire include:
#include <Wire.h>               // Only needed for Arduino 1.6.5 and earlier
//#include "SSD1306Wire.h"        // legacy: #include "SSD1306.h"
#include "SH1106Wire.h"   // legacy: #include "SH1106.h"


#ifndef STASSID
#define STASSID "XXXXXXX"
#define STAPSK  "XXXXXXX"

#endif

const int led = 13;
const char* ssid = STASSID;
const char* password = STAPSK;

// defines pins numbers
const int trigPin = 2;  //D4
const int echoPin = 0;  //D3
const int buzzerPin = 13; //D7

// defines variables
long duration;
int distance;


SH1106Wire display(0x3c, SDA, SCL);     // ADDRESS, SDA, SCL

void setup() {
  Serial.begin(9600);
  Serial.println();
  pinMode(buzzerPin, OUTPUT);
  digitalWrite(buzzerPin, LOW);
  pinMode(trigPin, OUTPUT); // Sets the trigPin as an Output
  pinMode(echoPin, INPUT); // Sets the echoPin as an Input

  // Initialising the UI will init the display too.
  display.init();

  display.setFont(ArialMT_Plain_10);
  Serial.println("Booting");
  WiFi.mode(WIFI_STA);
  WiFi.begin(ssid, password);
  while (WiFi.waitForConnectResult() != WL_CONNECTED) {
    Serial.println("Connection Failed! Rebooting...");
    delay(5000);
    ESP.restart();}


  ArduinoOTA.onStart([]() {
    String type;
    if (ArduinoOTA.getCommand() == U_FLASH) {
      type = "sketch";
    } else { // U_FS
      type = "filesystem";
    }

    // NOTE: if updating FS this would be the place to unmount FS using FS.end()
    Serial.println("Start updating " + type);
  });
  ArduinoOTA.onEnd([]() {
    Serial.println("\nEnd");
  });
  ArduinoOTA.onProgress([](unsigned int progress, unsigned int total) {
    Serial.printf("Progress: %u%%\r", (progress / (total / 100)));
  });
  ArduinoOTA.onError([](ota_error_t error) {
    Serial.printf("Error[%u]: ", error);
    if (error == OTA_AUTH_ERROR) {
      Serial.println("Auth Failed");
    } else if (error == OTA_BEGIN_ERROR) {
      Serial.println("Begin Failed");
    } else if (error == OTA_CONNECT_ERROR) {
      Serial.println("Connect Failed");
    } else if (error == OTA_RECEIVE_ERROR) {
      Serial.println("Receive Failed");
    } else if (error == OTA_END_ERROR) {
      Serial.println("End Failed");
    }
  });
  ArduinoOTA.begin();
  Serial.print("IP address: ");
  Serial.println(WiFi.localIP());


}


void calcDistance(int delayTime) {
  digitalWrite(trigPin, LOW);
  delayMicroseconds(2);

  // Sets the trigPin on HIGH state for 10 micro seconds
  digitalWrite(trigPin, HIGH);
  delayMicroseconds(10);
  digitalWrite(trigPin, LOW);
  // Reads the echoPin, returns the sound wave travel time in microseconds
  duration = pulseIn(echoPin, HIGH);

  // Calculating the distance
  distance= duration*0.034/2;
  updateDisplay(distance);
  delay(delayTime);

}

void updateDisplay(int distance) {

  if (distance<50) {
      display.setFont(ArialMT_Plain_10);
      display.drawString(0, 0, "ACHTUNG GEFAHR");
         display.setFont(ArialMT_Plain_24);
      display.drawString(0, 26, String(distance) + " cm");
       display.drawXbm(70, 14, achtungBruderImg_width, achtungBruderImg_height, achtungBruderImg_bits);
     buzzTheBuzzer(100,200);

  }else{
      display.setFont(ArialMT_Plain_10);
      display.drawString(0, 0, "Alles safe, Brudi:)");
          display.setFont(ArialMT_Plain_24);
      display.drawString(0, 26, String(distance) + " cm");
    }

  }

void buzzTheBuzzer(int buzzerDuration, int buzzerPause){

    tone(buzzerPin, 261);
    delay(buzzerDuration);
    noTone(buzzerPin);
    delay(buzzerPause);

    tone(buzzerPin, 293);
    delay(buzzerDuration);
    noTone(buzzerPin);
    delay(buzzerPause);

       tone(buzzerPin, 329);
    delay(buzzerDuration);
    noTone(buzzerPin);
    delay(buzzerPause);

    tone(buzzerPin, 349);
    delay(buzzerDuration);
    noTone(buzzerPin);
    delay(buzzerPause);


}

void loop() {
  ArduinoOTA.handle();
  display.display();
  display.clear();
  digitalWrite(buzzerPin, LOW);

  calcDistance(2000);


}
3.2 Hooking up the buzzer
Everything seemed to be working, however besides the visual feedback I was missing an audio feedback both for the user but also for external people that might interfere with someone's personal space. The buzzer seemed like an adequate component to do that, so I added it to the board.
void buzzTheBuzzer(int buzzerDuration, int buzzerPause){

    tone(buzzerPin, 261);
    delay(buzzerDuration);
    noTone(buzzerPin);
    delay(buzzerPause);

    tone(buzzerPin, 293);
    delay(buzzerDuration);
    noTone(buzzerPin);
    delay(buzzerPause);

    tone(buzzerPin, 329);
    delay(buzzerDuration);
    noTone(buzzerPin);
    delay(buzzerPause);

}
3.3 First prototype in action
As you can see, the aimed functionality is given
- Detects distance
- Adjusts screen to display warning
- Outputs buzzing alert
Features to add:
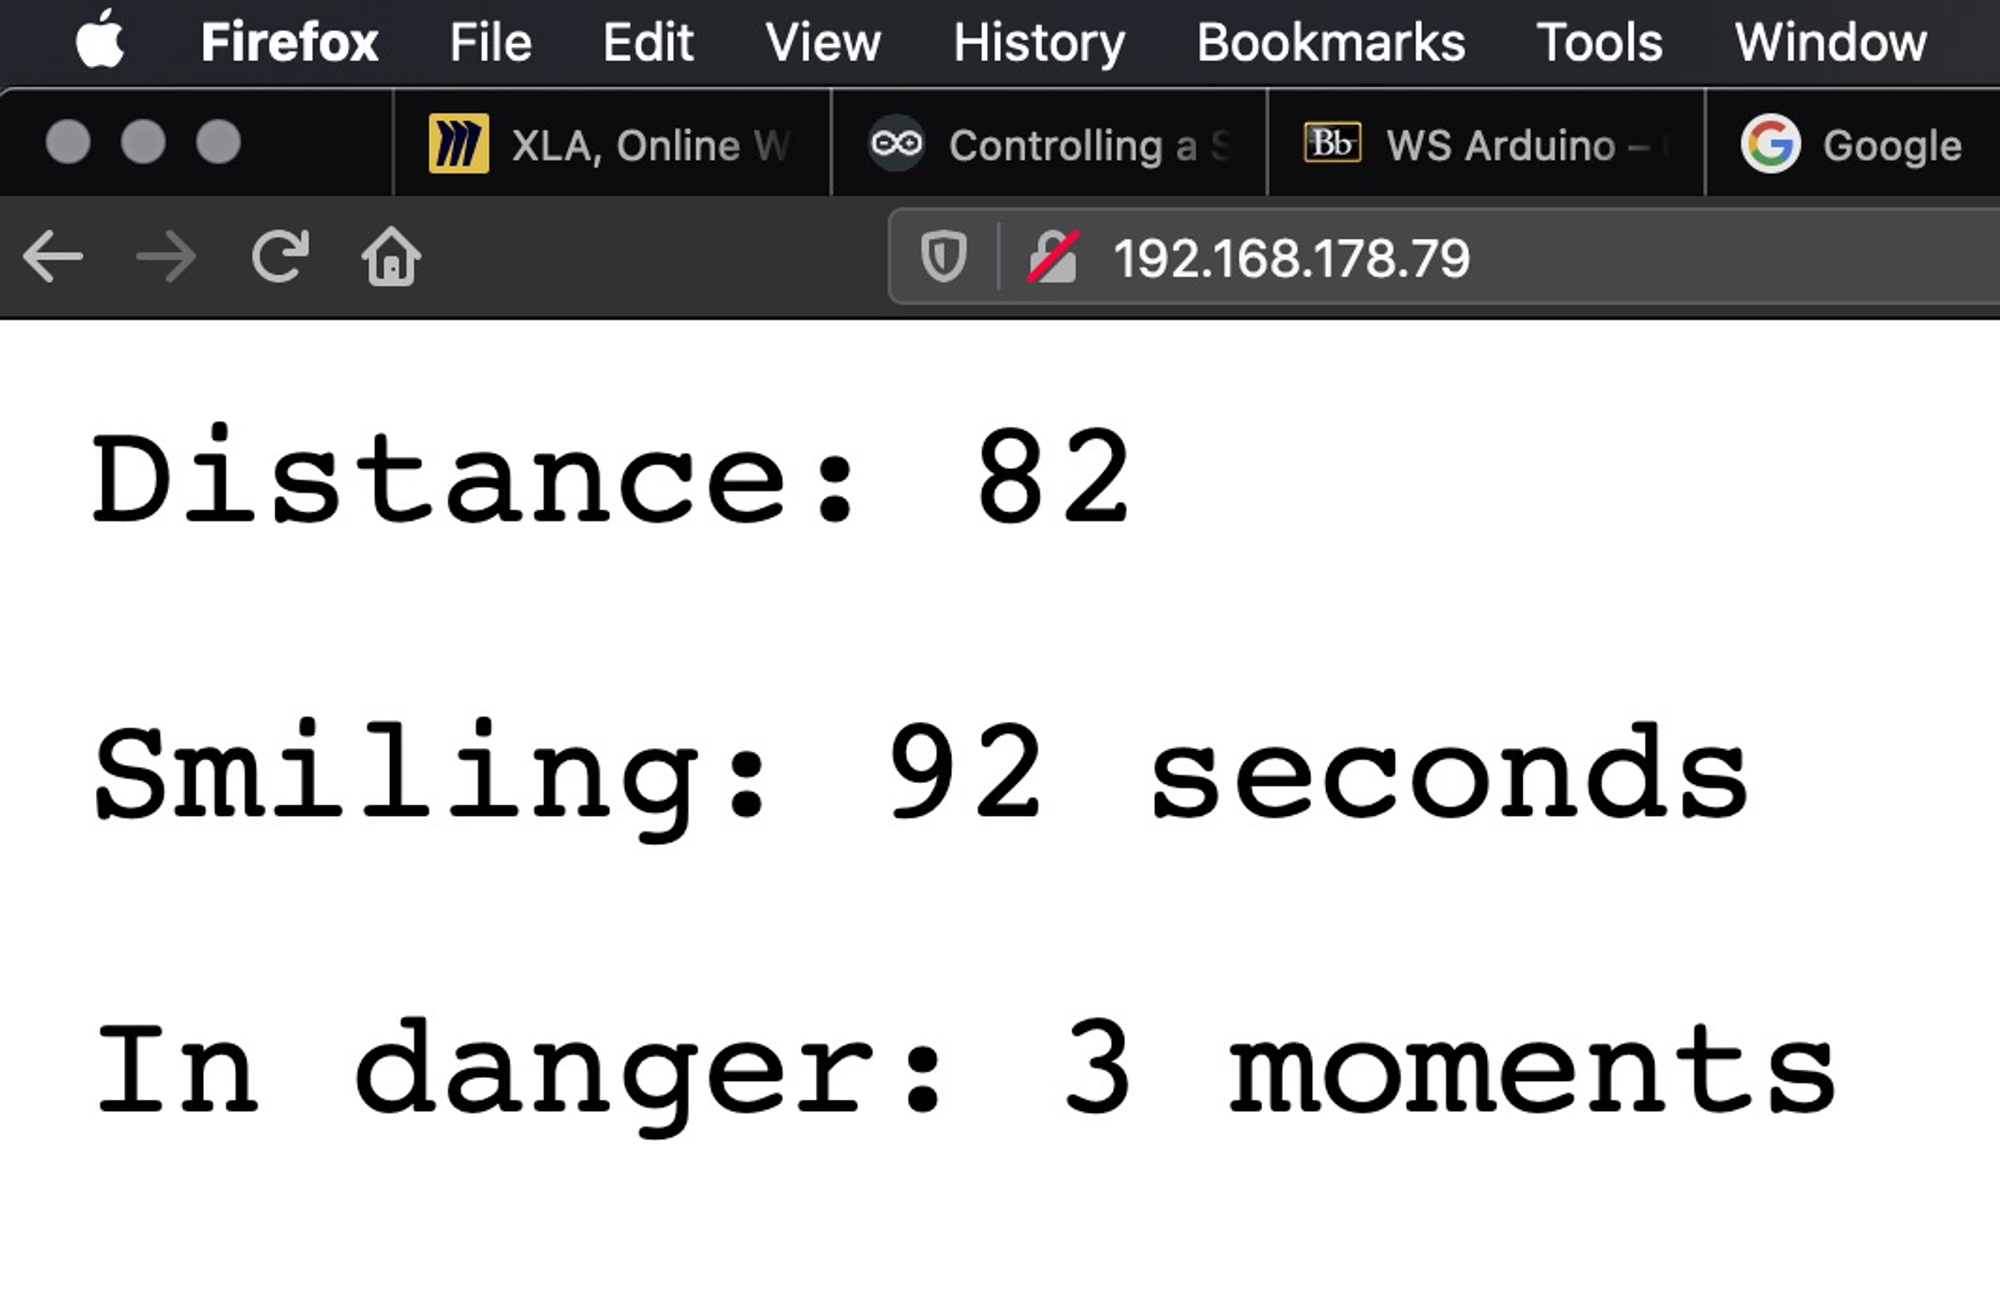
Web server with summary pages of
- Amount of time smiled during the day
- Contacts with other people + shared information
3.4 User testing & Feedback
The main insight I gathered from the user testing was that the screen was too small or I should at least make the smiley face more visible.
After all I decided to leave out the distance details and just switch between smiley face and sad face,as you can see in the final prototype for this project.
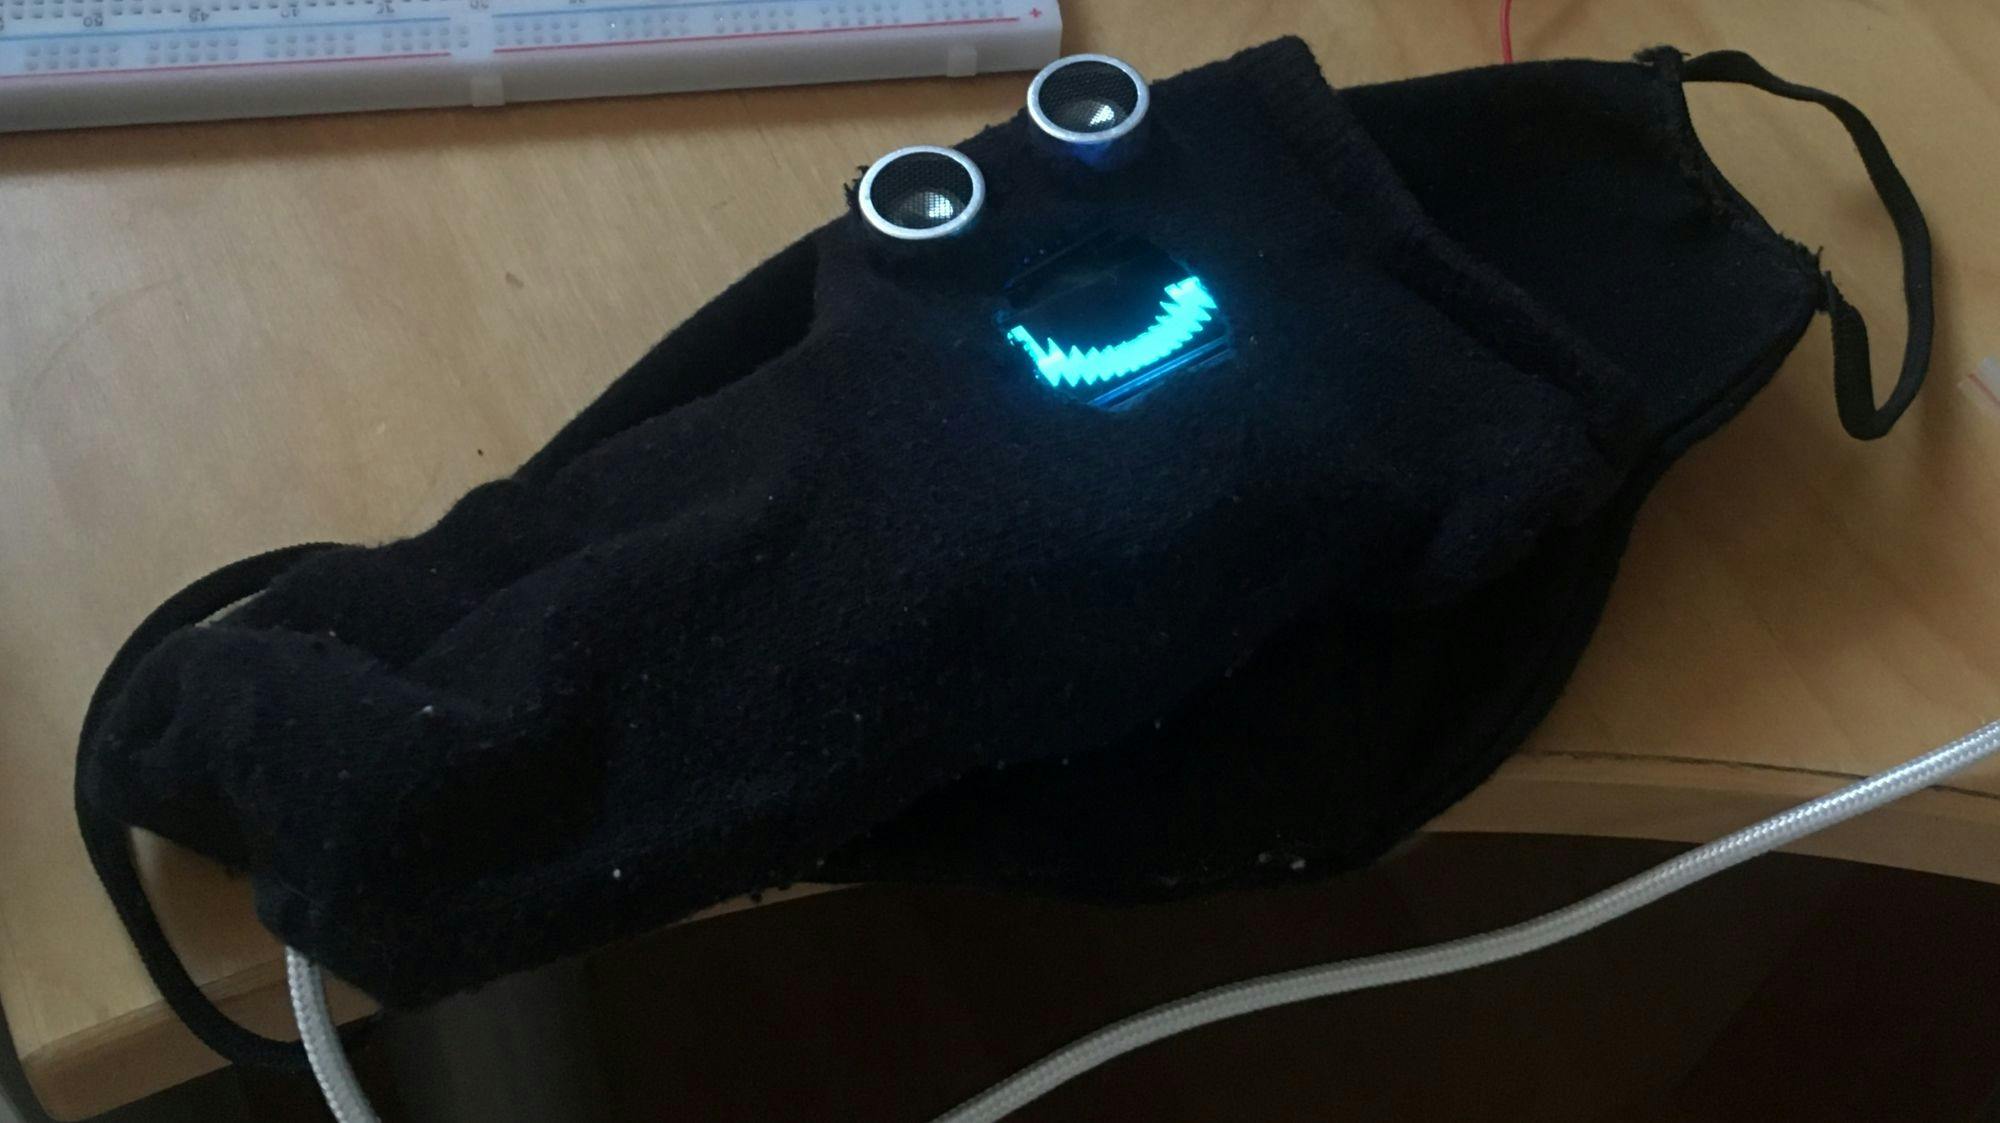
3.5 Final prototype
Prototype "masemocio" by Phil Wornath, created in the scope of the course "Human Technology" at The Hague University. 18035949

3.6 ESP8266 based mask-extension
- Wrapped into tailored sock, attached with velcro tape to cotton mask
- With OLED screen (Bitmap is displayed slightly distorted, need to look into that)
- Distance sensor
- Piezo buzzer

3.7 ESP8266 Webserver
Using the ESP8266 it is possible to do both, Over-the-Air deploying and exposing data from the sensors to a webserver running on the device.
Using the ESP8266WiFiMulti library, it is possible to link the device to different WiFi networks, such as the phone hotspot or the home WiFi with the clear advantage that the device updates whenever there is a known network in range.

3.8 Vision / Next steps
Hardware to add
- Muscle sensor OR conductive rubber cord sensor (If realistic reflection of emotions turns out to be required at all - otherwise a permanent smile controlled by distance should work as well)
- Infrared OR Bluetooth Low Energy for connection tracking
Software to add
- Companion web app running on the ESP8266
- Build smart contract around the mask - ID of passed by devices (public keys exchanged by Infrared or BLE are published to Ethereum network and actual contact data can be exchanged upon given consent)


4 Reflection
In the beginning I rather saw the challenge to address the lack of emotion in the ongoing crisis but then saw the potential to combine it with a distance warning system because I believe the only way we can obtain a long lasting impact in behaviour change is setting people aware of their behaviour. This once another time made clear, how important thorough research and tinkering is.
Another featureI clearly did not see in the beginning was the actual possibility to exchange contact data between the smart masks.Thinking beyond the obvious and sometimes invert the desired outcome (e.g. Going from "We want people to strictly maintain distance" to "We want people to connect and make love after that crisis") yet another time showed, how important that technique can be.
Overall I really enjoy the idea of reducing the scope to wearable devices for this workshop. I am really looking forward to what others created, as there might be countless other things to wear on our bodies.
5 Revision
After finishing the last project Challenge 4: Playful Interaction, I found that besides the delay() function, which might work in some cases but rather should be seen as “quick and dirty”-fix. there is another way of timing actions in the running code. I will however not apply these changes to this challenge - it is primarily to mention as I want to make the learning curve clear.