

1 Research1.1 Otto - a truely interactive and flexible robot for small makers 1.2 Miro - a physical creature for education1.3 TEO - A robot for children with Neurodevelopmental disorders1.4 Conclusion2 Tinkering2.1 The choice of water bottle2.2 Measuring the water level - Distance sensor2.3 Measuring the water level - Humidity sensor2.4 Damn, now that's precise: Fine scale2.5 Adding a capacitive touch interface2.6 Output to a visual interface3 Design & Build3.1 User feedback3.2 Unforseen obstacles3.3 The basic concept3.3 Product demo3.4 GitHub Repo4 Reflection5 Next steps
1 Research
1.1 Otto - a truely interactive and flexible robot for small makers
When mocking a real creature, I think that making it somehow "adorable" is one crucial aspect. With 20 programmable gestures, Otto can do this and yet stays on a very versatile level. The main objectibe behind Otto is giving our smallest makers an easy way to start their making carrer in a playful and relatable way, without starting right with arduino-level components. I think it makes sense, to keep the treshold of entry low, so the children don't lose interest right in the beginning.


1.2 Miro - a physical creature for education
I have always been versed towards innovative Ed-tech solutions
Miro is a friendly, intelligent and highly interactive robot dog designed for use in schools and universities
Whether the robot looks more like a dog or a bunny is doubtful - but it serves a clear purpose: It embodies a creature, humans can easily empathize with.
And there are two ways of doing that with Miro : Children can learn with ease, how to program it, so it creates a useful habit, rewarded with playful interaction. At the same time, it has many sensors and endless possibilities of combining actions. For example a small child could program the creature for his grandmother in the elderly care with meaningful content (e.g. the original barking sound of the ever loved old dog) I really like the versatility level here of having more than just one use case for the robot.


1.3 TEO - A robot for children with Neurodevelopmental disorders
Behavioural change & support is especially interesting in the younger ages, where our brains are still "flexible". The politechnical institute of Milan conducted a research focussing on children with neurodevelopmental disorders, that usually affect emotion, learning ability, self-control, and memory. Core of the research consisted of the interaction with between Teo (the robot) and the children.
“[...] all therapists involved in our study agree that free play with Teo has elicited operational behaviors, social interaction, and emotional responses that normally do not occur using other methods, or that require a much longer time to be achieved“
Reading such studies gave my overall opinion on playful robots an entirely different spin, as there apparently is clear evidence that emotional creatures can really cause behavioral change and carry a purposeful, positive impact for the general purpose.
1.4 Conclusion
There are plenty of approaches on building artificial creatures for a variety of target audiences.
But in what way could I myself (or like-minded people) profit from such a creature?
During home-isolation I was facing one problem over and over again:
“Keep hydrated: I drink at least 4 litres of water a day.”g Kelvin Fletcher
Staying hydrated, especially in intense working phases turned out to be an accessibility and habit-problem for me.
In the Netherlands I somehow managed to solve this during the winter time by always having my tea pot 🍵 in sight.
Using a tea light / candle makes the pot even more visible, while contributing to the overall atmosphere and the benefit, that the tea is always at the right temperature.
Thus it is made desirable to drink the tea at any time - which I do in intervals of around 20 minutes and usually drink 3 liters of tea per day. But winter time is over now and my water bottle is doing nothing to engage me.
So, how might we solve this for drinking water?
2 Tinkering
The challenge direction for now was kind of clear.
Give my water-bottle some personality, transform it into a creature, that persuades me to drink sufficient water during the day while supporting me in the daily workflow.
2.1 The choice of water bottle
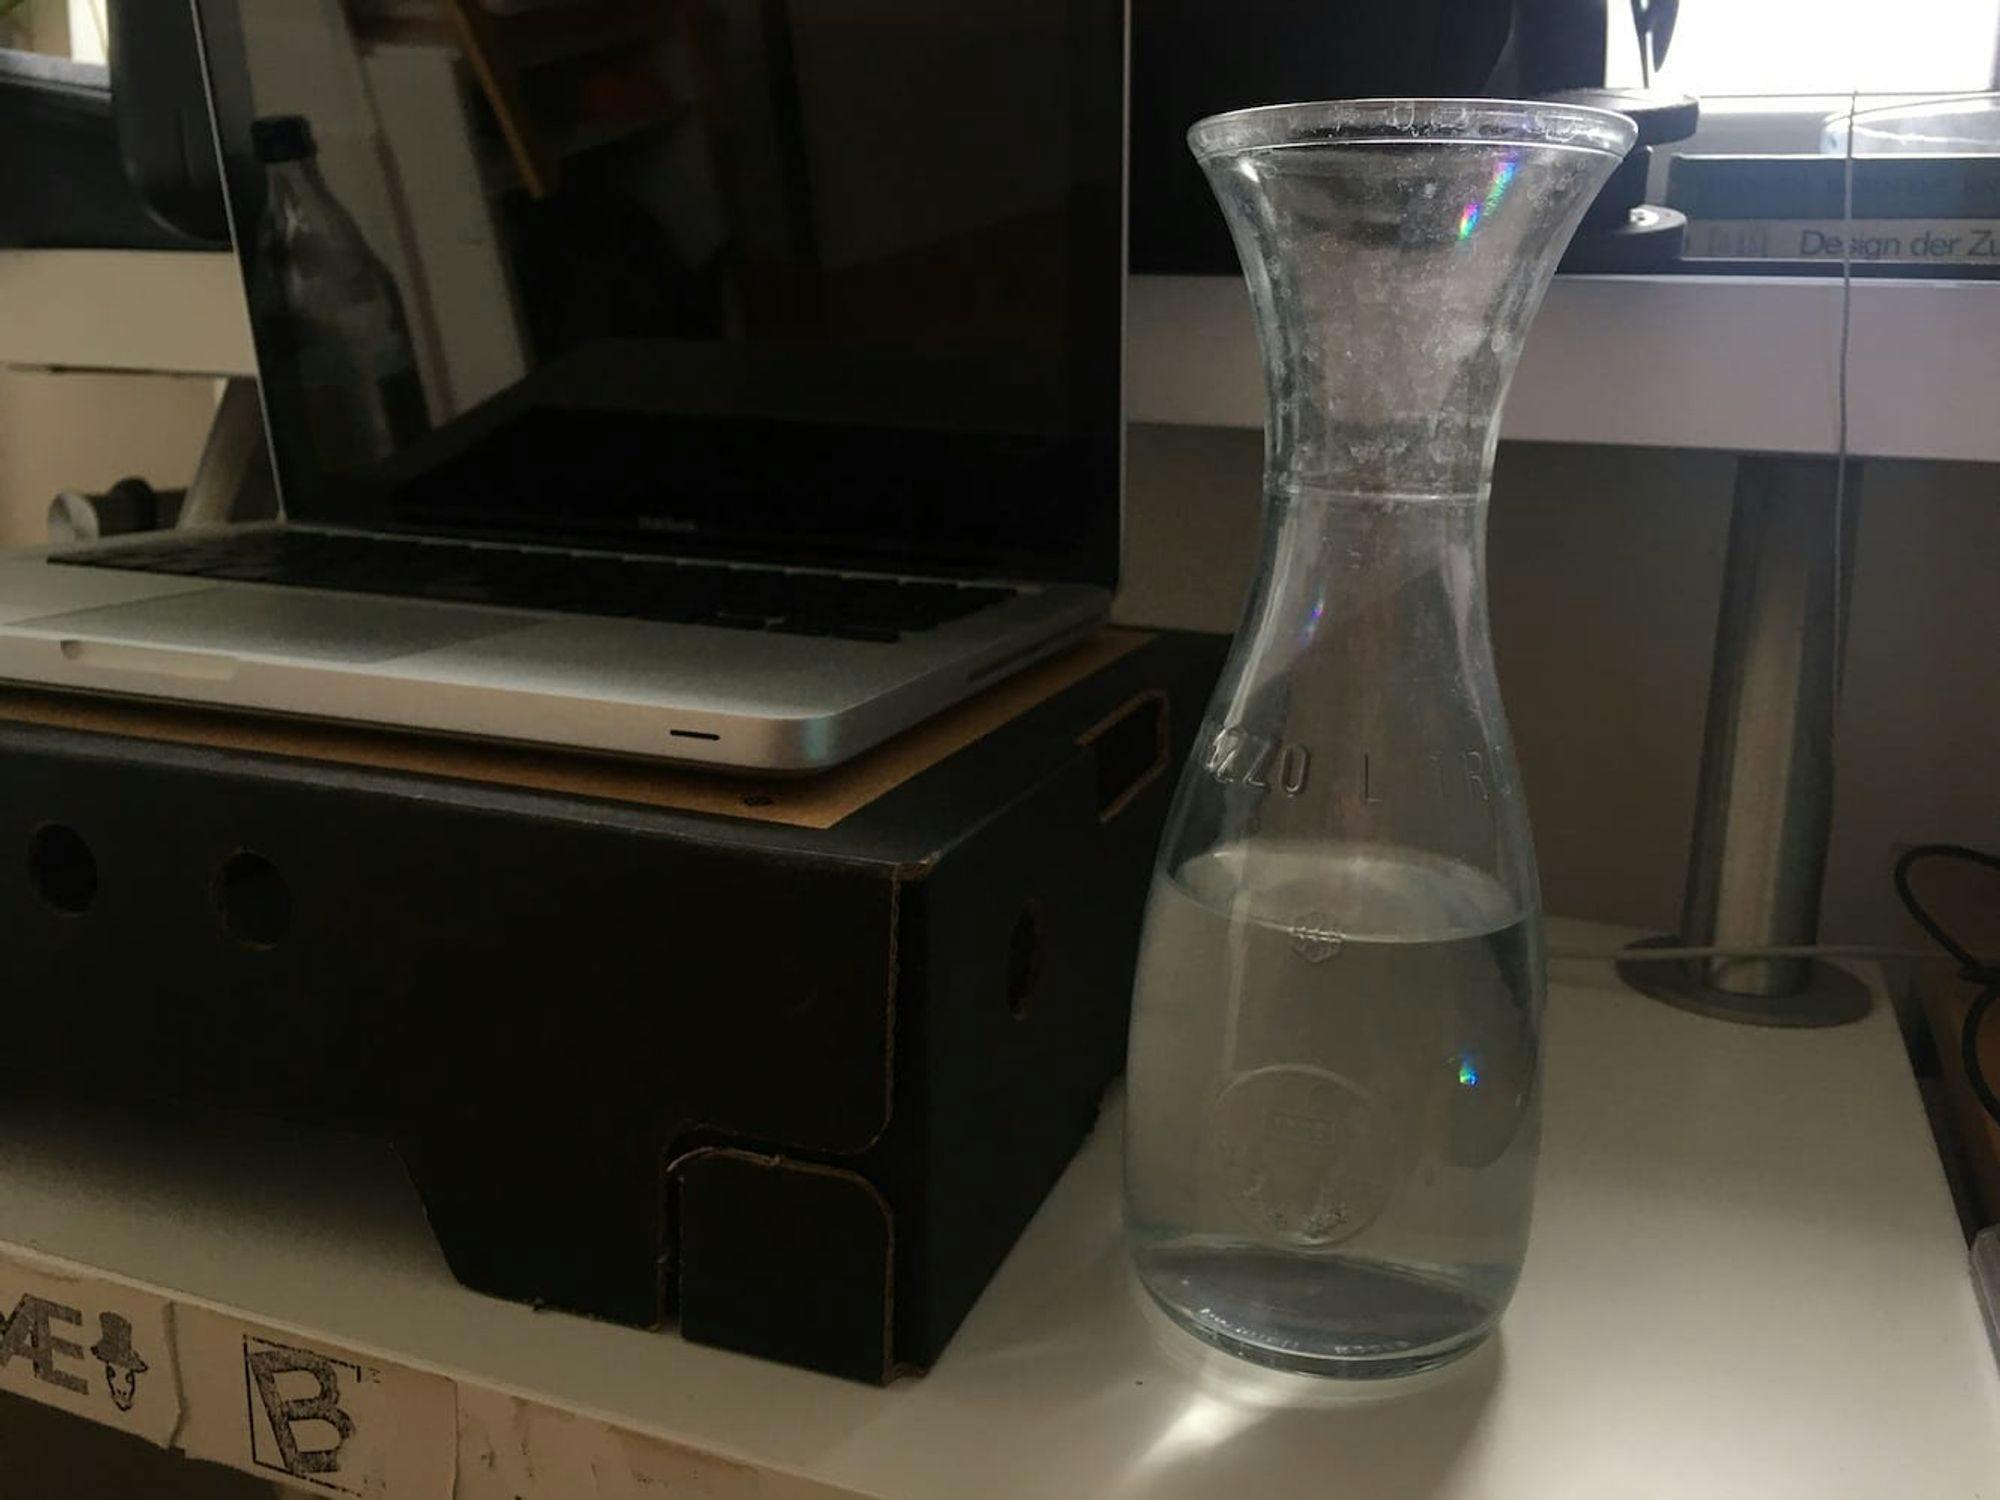
In the beginning I was not entirely sure on how to approach it and which water bottle to use. Are there differences among them? Which water bottle is able to represent a creature in the best possible way? How is light reflected in the bottle - does it look somehow magical?
After some testing of different bottle shapes (cylindric, classical and concave flask-like shape) I came to the conclusion, that the flask-like carafe offers the best accessibility for drinking, as there is no haptical threshold .
When testing the radiated light effect By using a normal phone LED, surprisingly it was also the flask-like carafe offering the overall most satisfying light reflections.

After a phase of ideation I found which core elements my desired creature would need.
Functionalities
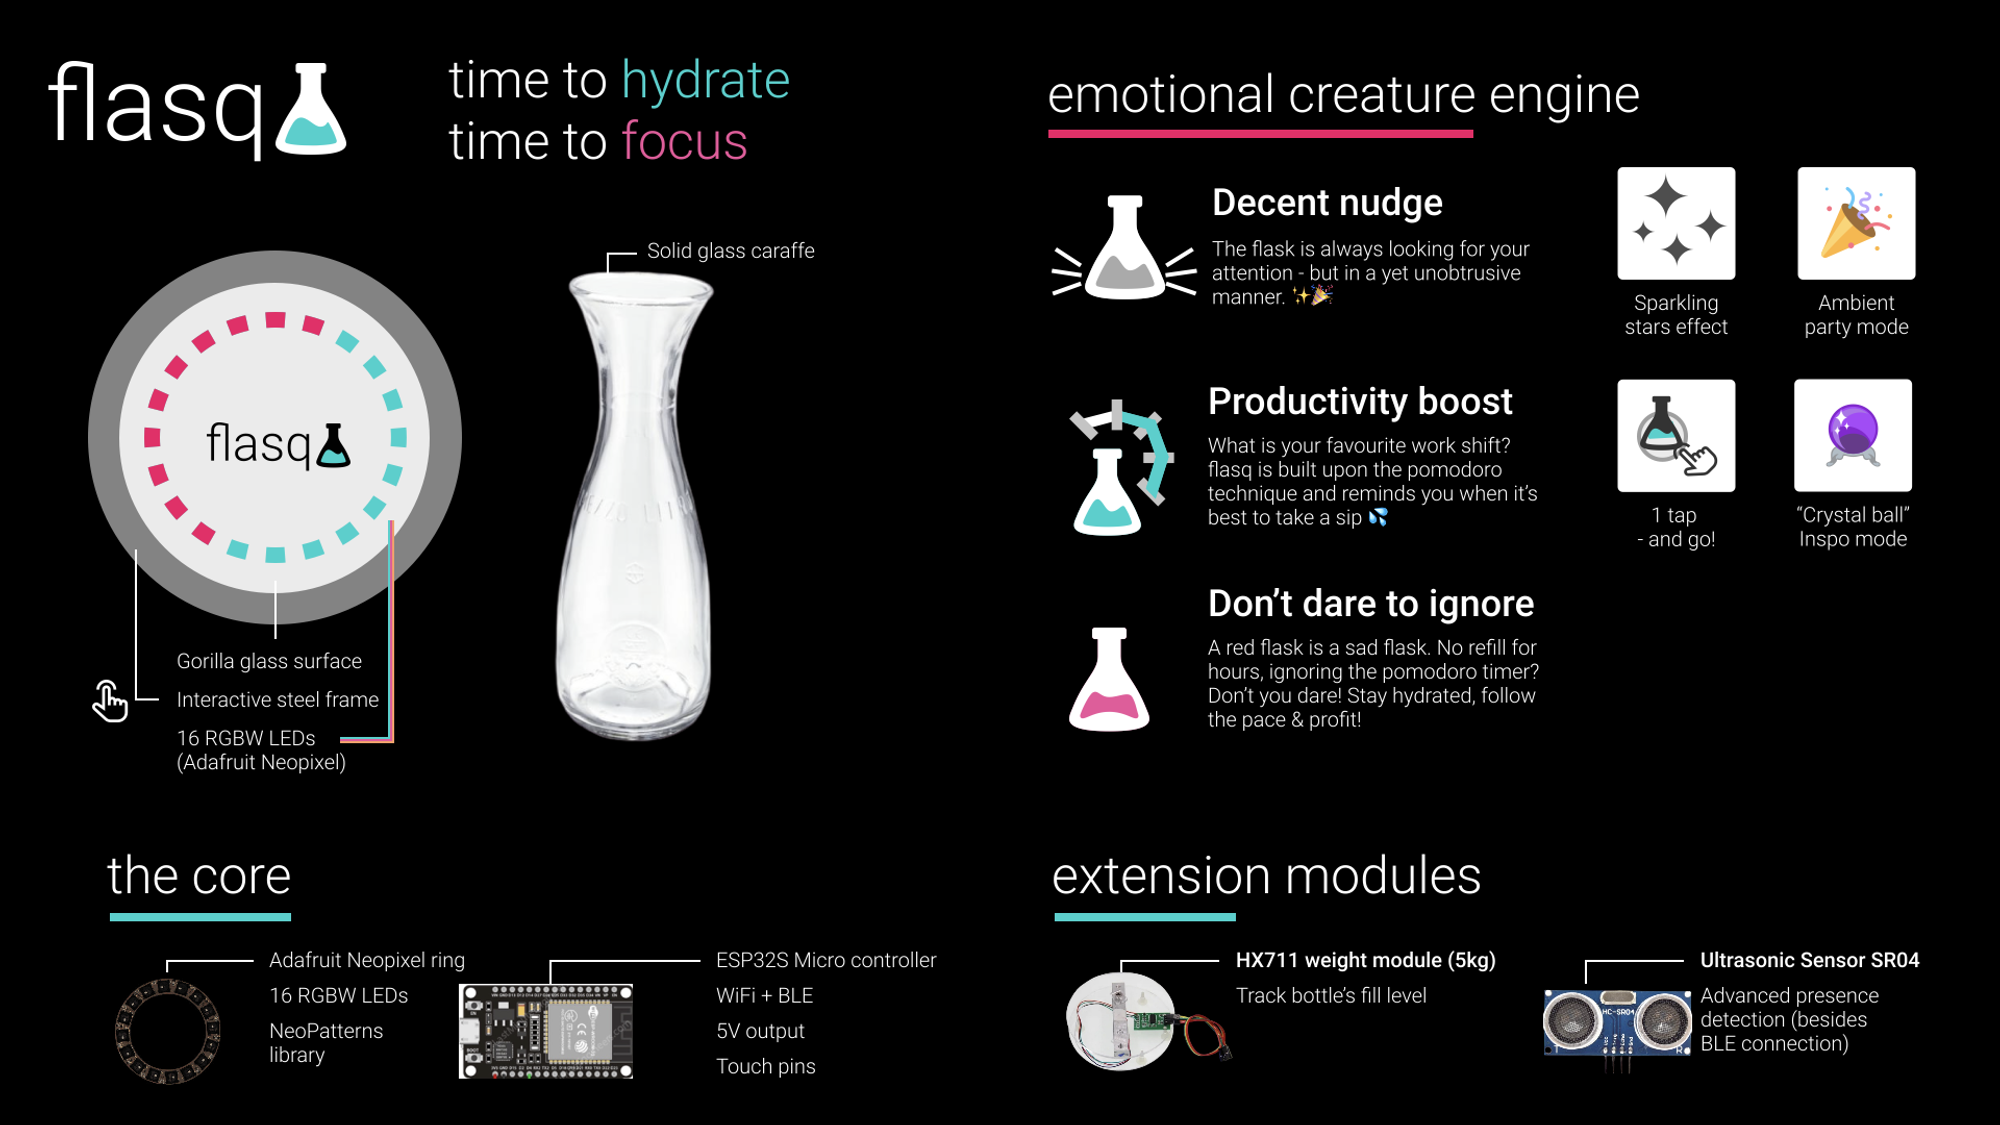
- Ambient light
- Pomodoro timer
- Behave like an assistant
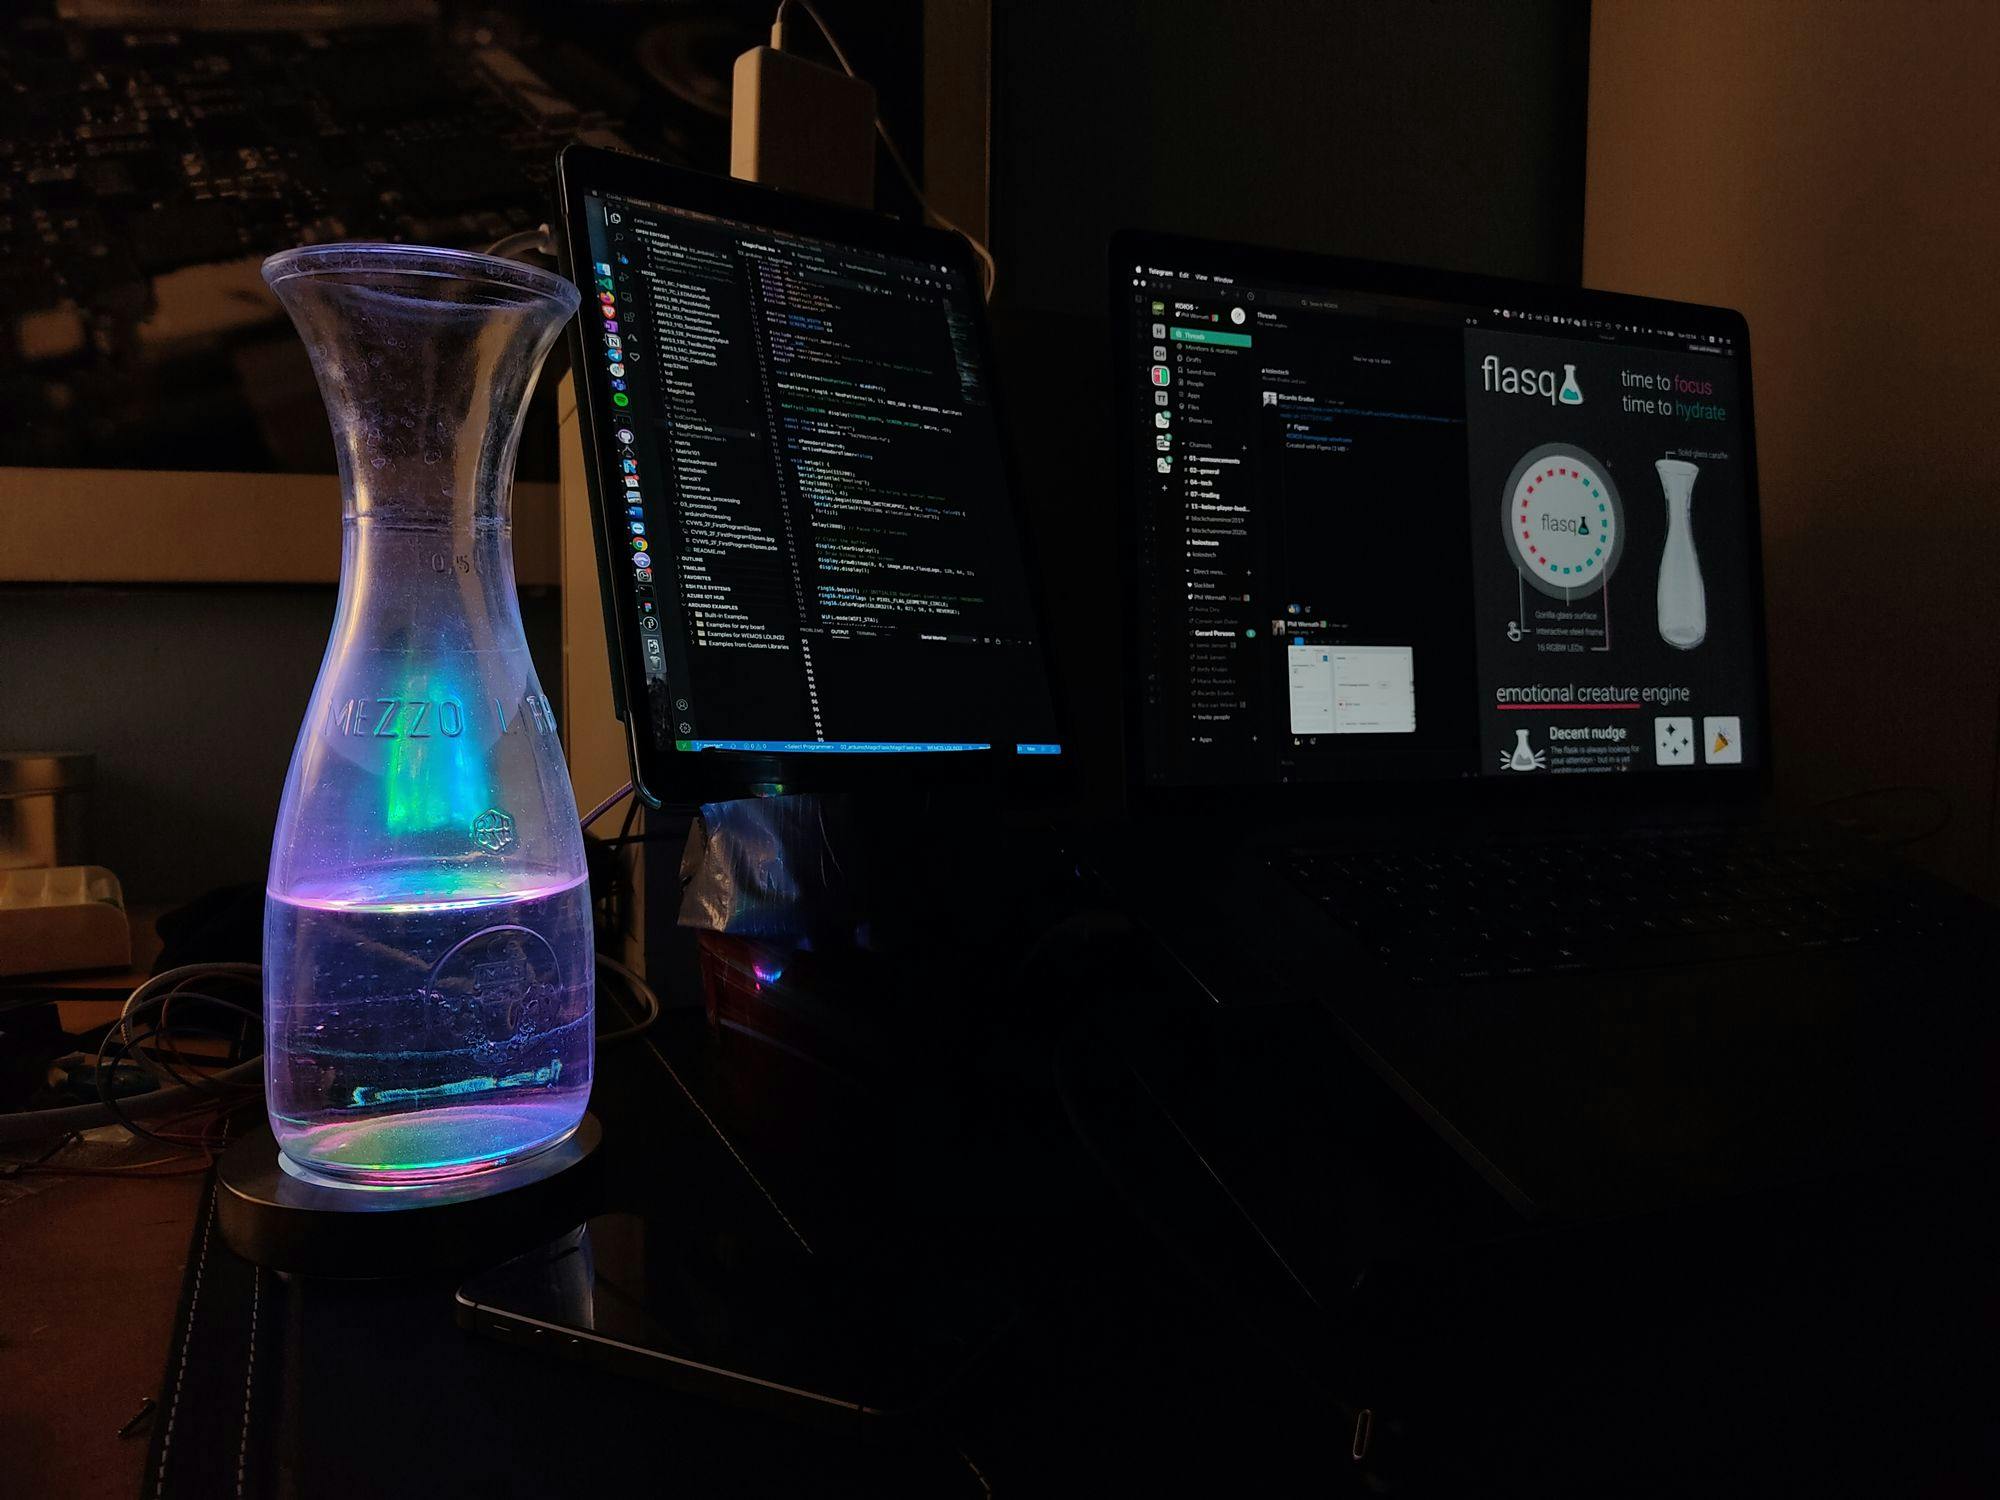
Why ambient light? I found that the only object in my room not casting any ambient rgb light was indeed, my water carafe. Everything a creature in my room thus really needs to catch my attention in the dark, is a proper RGB light source
Inspired by the Amazon Echo Dot device in my room which features a futuristic led ring, that basically embodies a virtual creature by being round-shaped, I did research on RGB rings and ended up buying a knockoff version of the popular Neopixel LED rings.

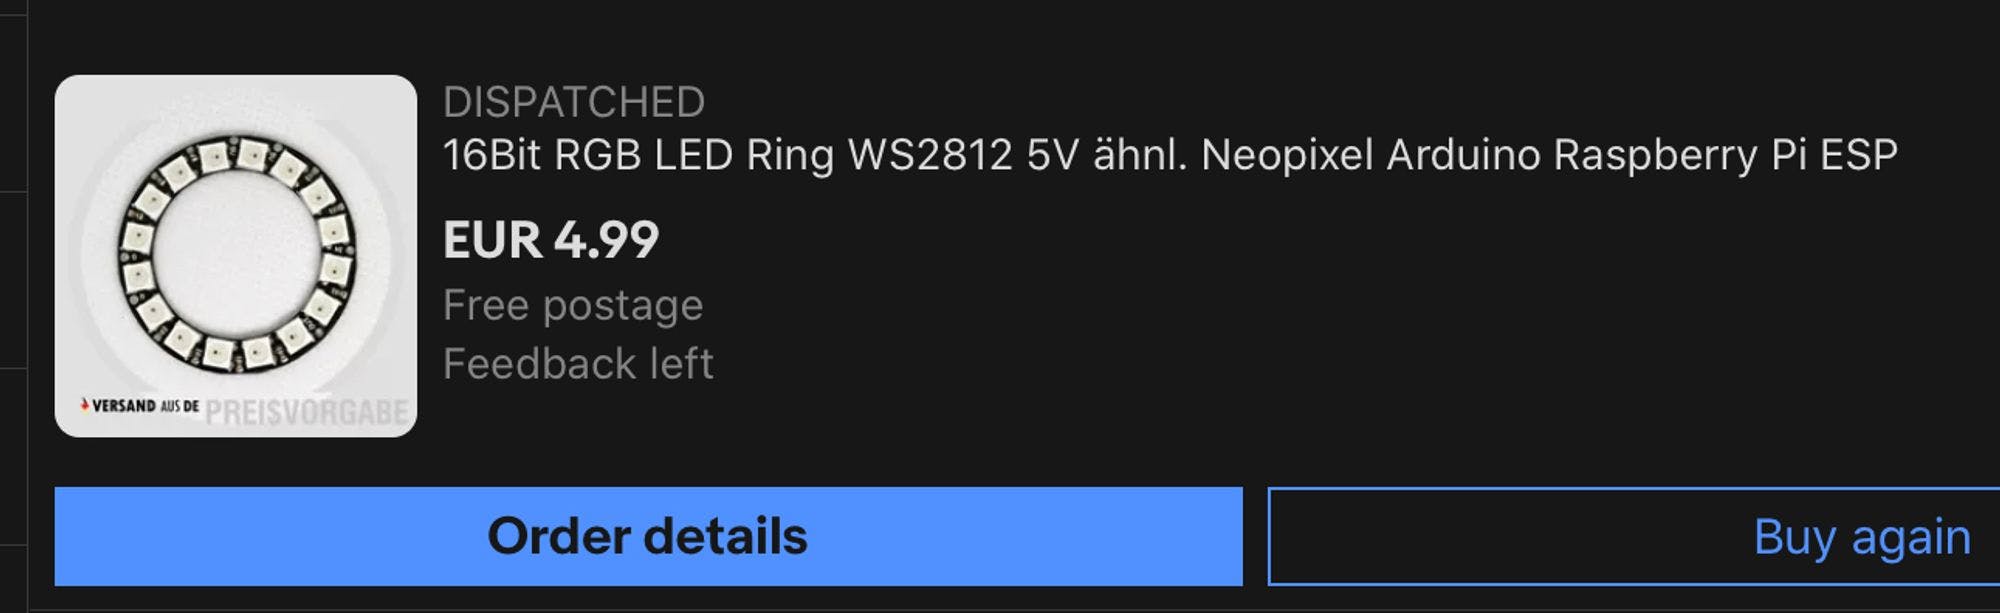
After a few days it arrived and after soldering the contacts, I was wondering, how to place the carafe on it.


Eventually I found a spare glass jar with possibly suitable lid.


2.2 Measuring the water level - Distance sensor
Quick reminder: As we are building a creature here, I saw it as a consequence that this creature should somehow be conscious and self-aware. The inner need of the creature is giving and losing water, just as with us humans - and this should be communicated in some way.

When attaching the distance sensor to the top of the bottle, what it measures, is: the bottle. It does not measure the water level. When gradually emptying the bottle, I was did not find any differences in values - and it has a plausible reason when understanding, how the distance measurement works. The ultrasonic sound is both sent and received by the sensor. What it measures is the distance in between these two events.
Bottom line: This would only work with opened-up carafes matching the diameter of the distance sensor.
Initially I thought about testing a smaller sensor or laser distance sensor but after all realized that the carafe I use in The Netherlands has an aluminum lid and measuring the water level based on distance would not work at all in that case.
2.3 Measuring the water level - Humidity sensor
Why would this even work? The water is trapped in the bottle, there is no way out.

Sure I thought - but what did I have to lose? With the humidity sensor either placed close to the lid or right next to the bottle there were no significant changes in values to observe. As I already started doubting whether the sensor was working at all, I tired blowing some air in its direction. Suddenly it showed some measures. To visualize the impact, I connected an LED matrix.
Now that I see how reliable it indeed works with droplets / human breath, I think this addition might be interesting for Challenge 2: Wearable Technology - másemote smart mask, so in addition to the distance sensor it could detect harmful external aerosol 🌬
2.4 Damn, now that's precise: Fine scale
Considering how cheap all those sensors are compared to comparable single-purpose devices and the fact, I was still in a deep need for a fine scale, for cooking and baking of course, I ordered this digital scale from BangGood.
In excitement how precise the measurements were, the sleekness and stability of the initial prototype seemed way higher. Furthermore I thought this would go way beyond the "MVP" prototype for now, so I decided to leave it out and focus on the core creature for now.
Nevertheless I will take it into consideration for next steps, as precise tracking of water intake could be interesting data to work with but current user testing showed clear evidence, that already the lighting gives sufficient motivation to refill the bottle and a low water status will less likely be required.

2.5 Adding a capacitive touch interface
Capacitive touch had been prone to difficulties from the beginning. Using the Arduino R3 board it never really seemed to work for me, probably due to improper grounding, although both the Raspberry Pi and Arduino were connected with power adapters, not to a laptop running on battery.
I however didn’t want to give up on that and checked on whether it might be possible to connect a capacitive surface to an ESP32 (The board I am working with for this project). Surprisingly the ESP32 features 8 separate touch pins, that can be connected to all kinds of surfaces and called by a function provided by the ESP32 library.
Soldering the cable to the aluminum ring however was problematic in the first place, as the material inside has some kind of plastic coating mixed with metal ( And this is where I wanted to attach the touch cable). After a few minutes, the connection became loose over and over again, so I decided to melt down the plastic inside to a deeper level and finally managed to solder a stable connection.
As you can see in the following video, the aluminum ring is now touch-sensitive and can switch between pomodoro and Idle mode.
2.6 Output to a visual interface
I already spent a bit of time on getting the ESP32’s internal web server to run and briefly read through tutorials on Flutter, a universal app framework that would enable the flask to exchange information via BLE or WiFi with a connected mobile device, using a (mobile) (web) app.
However for the sake of proceeding in this tinkering-process and having something relevant to document here, I decided to test the ESP32 with Processing first - because I knew that should work in any case. And it did, after adjusting the baud rate from 9600 to 115200, which is the ESP32’s default baud rate
Baud-rate indicates the transferred bits per second, meaning with the default setting on the ESP32 I could potentially transfer more data per second.
As shown in the following video, it is now possible to see the status of the flask visually on your computer.
3 Design & Build
3.1 User feedback
It’s like some higher instance is observing me and giving me creative juice during work - just like a crystal ball.
It might not have eyes, but it certainly has a body - a glass body where the ingredients and the play of light define its emotional state. A truly mystical creature you don't want to mess up with.
3.2 Unforseen obstacles
During the building process I faced some unexpected yet logical problems.
Problems with the code
void setup() {
  Matrix.init(); // MAX7219 initialization
  Matrix.setIntensity(8); // initial led matrix intensity, 0-15
  lcd.begin(16, 2);
  lcd.setCursor(0, 0);
  Serial.begin(9600);
  #if defined(__AVR_ATtiny85__) && (F_CPU == 16000000)
  clock_prescale_set(clock_div_1);
  #endif
  // END of Trinket-specific code.
  pinMode(sensorPin, INPUT);

  pixels.begin(); // INITIALIZE NeoPixel pixels object (REQUIRED)
}

void writeProduct() {

    currentProduct = productInventory[random(0, productInventoryLength)];
    lcd.setCursor(0, 0);
    lcd.print(currentProduct);
    Serial.print(currentProduct);
    delay(oneSecond);

}
void writePrice() {

    lcd.setCursor(0, 1);
    lcd.print("FRISCH!");
    delay(oneSecond);
    lcd.setCursor(0, 1);
    lcd.print("JETZT KAUFEN!");
    delay(oneSecond);

}

void readSensor() {
  sensorVal =digitalRead(sensorPin);
  Serial.println (sensorVal);
  // when the sensor detects a signal above the threshold value, LED flashes
  if (sensorVal==HIGH) {
    Serial.print("HIGH");

  }
  else {
    Serial.print("LOW");

  }
}

void runLED() {
    pixels.show();   // Send the updated pixel colors to the hardware.
    colorWipe(pixels.Color(243, 0, 103), 50); // Pink
    delay(oneSecond);
    colorWipe(pixels.Color(0, 209, 205), 50); // Cyan
    delay(oneSecond);
    // Send a theater pixel chase in...
    rainbowCycle(20);
  pixels.clear();

}

void runMatrix() {
  byte c;
  delay(100);
  Matrix.shiftLeft(false, true);
  printStringWithShift(string1, 100);  // Send scrolling Text

}


// Put extracted character on Display
void printCharWithShift(char c, int shift_speed){
  if (c < 32) return;
  c -= 32;
  memcpy_P(buffer, CH + 7*c, 7);
  Matrix.writeSprite(maxInUse*8, 0, buffer);
  Matrix.setColumn(maxInUse*8 + buffer[0], 0);

  for (int i = 0; i < buffer[0]+1; i++)
  {
    delay(shift_speed);
    Matrix.shiftLeft(false, false);
  }
}

// Extract characters from Scrolling text
void printStringWithShift(char* s, int shift_speed){
  while (*s != 0){
    printCharWithShift(*s, shift_speed);
    s++;
  }
}

void loop() {
  runMatrix();
  writeProduct();
  writePrice();
  runLED();

}
The NeoPixel library which addresses the core of my product, the RGB LED Ring, uses functions to run through different programs, basically rigidly defined colour sequences, consisting of the pattern in use, the direction it is running in and the current state of the pattern.


"The Neopixel loop & delay problem is very similar to the servo sweep example we re-engineered in Part 1."
Having this entire sequences in your loop function or even as linked separate function, results in a blocking experience which is not desirable as there is no other interaction possible.
In order to get rid of that problem, I followed the approach mentioned below, using the NeoPatterns library, where an update-functions takes care of adressing the LEDs, while everything else is kept up and running, without blocking other processes.


Update: There would have been another way, using the millis()-function, which I more extensively describe in Challenge 4: Playful Interaction, but at that point of time, I did not manage to get it working and really grasped their functionality later.
3.3 The basic concept

3.3 Product demo

3.4 GitHub Repo
4 Reflection
In the beginning I was doubling about whether this project fits for the artificial creature challenge or would better suit the "Playful interaction" part. After all I am happy to conclude that the entire creature part gave the project a different twist, transforming a “glass body” from being just a bland “body” Into an interactive creature with real emotions in that sense.
Although my goals were higher in the beginning, aiming for having enough time to look into building a solution including BLE and WiFi , I am happy with the product as it is and received overall good resonance which shows yet another time : No over-engineering required for now. The proof-of-concept works as it is and I met my overall objectives.
Due to the received feedback I also know, which part in the concept I should now really be focussing on.
5 Next steps
I am somehow convinced that this product has some potential and could be developed further. Most likely I will be following these next steps:
- Develop the shown prototype further, create a native app with Flutter


- Conduct more research regarding user needs
- Would presence detection be a valuable feature?
- Would water level detection be a valuable feature?
- Develop product further based on research
- Solder connections fixed
- Improve product design
- Test the product under extreme conditions