

Assignments
Computer Vision Deliverables
Processing/Computer Vision: 2F, 2I, 2O, 3B, 3D, 3E, 4B


CVWS - 2F - FirstProgramElipses
Write a program that draws three (or more) ellipses:
• at various locations,
• with various colors
• various widths and heights
• with and without borders (of various colors)
I was playing around with all kinds of ellipses and ended up with a clown face.
Working code
// setup canvas
background(255,255,255);
size(600,600);


// generic color definitions

color cyan = color(62, 103, 102);
color white = color(255);
color black = color(0);
color red = color(255,0,0);


fill(cyan);
ellipse(height/8,width/8,300,100);
fill(red);
ellipse(height/2,width/2, 300,300);
fill(black);
ellipse(300,0.9*height, 500,100);


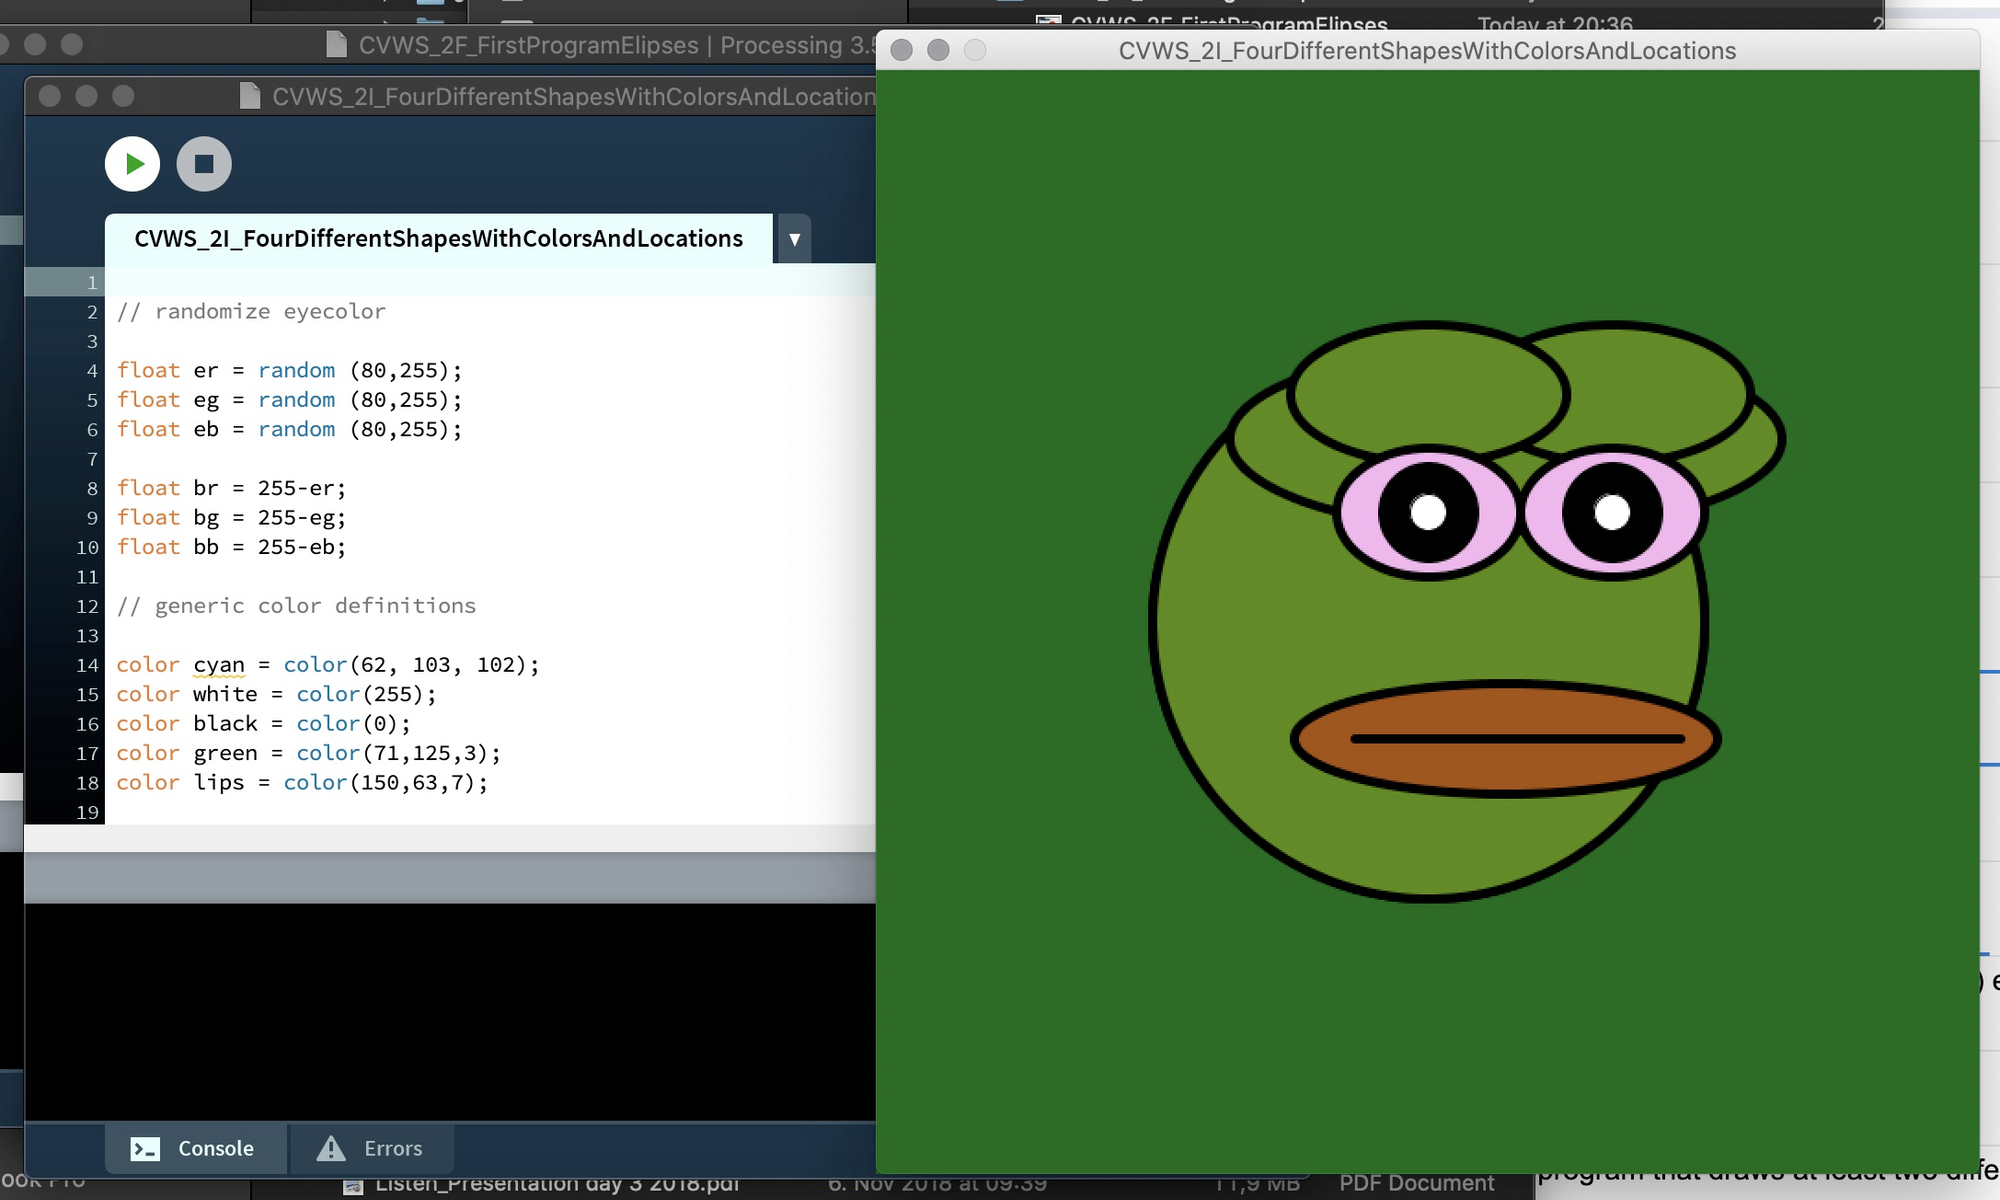
CVWS - 2I - FourDifferentShapesWithColorsAndLocations
Write a program that draws:
• at least four different shapes (not circles),
• in various colors,
• at various locations.
I really like Pepe the frog and decided to create the facial structure by using different shapes, colors and locations. After all I found that Pepe has no rectangles - but I will use the rect() function in a later assignment.
Working code
// randomize eyecolor

float er = random (80,255);
float eg = random (80,255);
float eb = random (80,255);

float br = 255-er;
float bg = 255-eg;
float bb = 255-eb;

// generic color definitions

color cyan = color(62, 103, 102);
color white = color(255);
color black = color(0);
color green = color(71,125,3);
color lips = color(150,63,7);


// setup canvas
background(br,bg,bb);
size(600,600);


// basic pepe
fill(green);
strokeWeight(5);
ellipse(height/2,width/2, 300,300);
ellipse(height/2,width/2, 300,300);
ellipse(height/1.75,width/3, 300,100);
//headparts
ellipse(height/1.5,width/3.4, 150,75);
ellipse(height/2.0,width/3.4, 150,75);


fill(er,eg,eb);

ellipse(height/1.5,width/2.5, 100 ,70);
ellipse(height/2,width/2.5, 100 ,70);

//pupills
fill(black);

ellipse(height/1.5,width/2.5, 50 ,50);
ellipse(height/2,width/2.5, 50 ,50);

//pupills-inner
fill(white);
strokeWeight(1);
ellipse(height/1.5,width/2.5, 20 ,20);
ellipse(height/2,width/2.5,20 ,20);


//lips

fill(lips);
strokeWeight(5);

ellipse(height/1.75,width/1.65, 230.0, 60);

line(height/2.3,width/1.65,height/1.37,height/1.65);

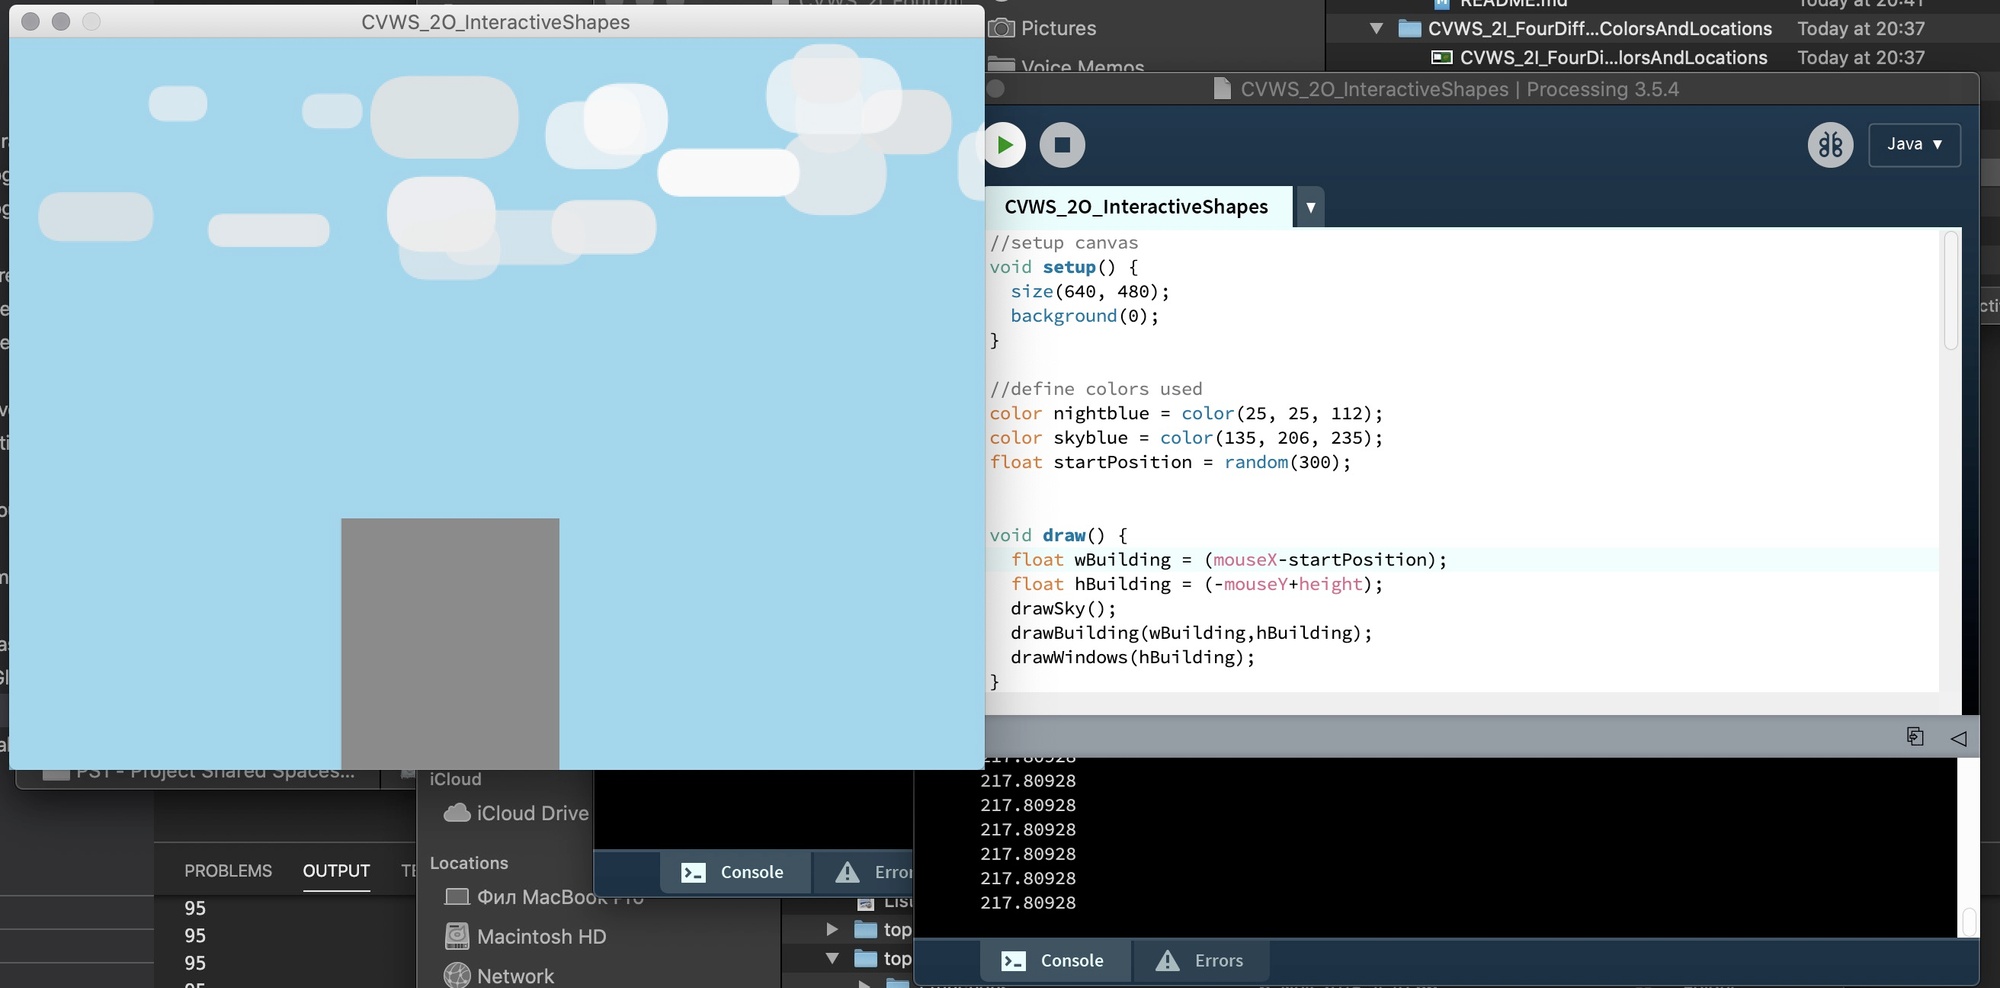
CVWS - 2O - InteractiveShapes
Write a program that draws at least two different shapes, with various colors and make them interactive.
Ideas:
• Draw a line where one of the ends follows the mouse.
• Draw a circle where the color is related to the location of the mouse.
• Draw a rectangle with the size related to the x location of the mouse. • Etc.
I took a bike tour at this day and saw these concrete buildings ("Plattenbauten") in a closeby neigborhood. After all , following a proper 70s soviet charme, they were really sticking to my head so I decided to rebuild them in Processing with interactive day- and night mode.
Working code
//setup canvas
void setup() {
  size(640, 480);
  background(0);
}

//define colors used
color nightblue = color(25, 25, 112);
color skyblue = color(135, 206, 235);
float startPosition = random(300);


void draw() {
  float wBuilding = (mouseX-startPosition);
  float hBuilding = (-mouseY+height);
  drawSky();
  drawBuilding(wBuilding,hBuilding);
  drawWindows(hBuilding);
}


void drawSky(){
  if (mousePressed){
    background(nightblue);
    for(int i=0; i < 100; i++){
      stroke(255,255,0);
      strokeWeight(2);
      point(random(width), random(width));
      frameRate(15);
  }
  }else{
    background(skyblue);
    noStroke();
    fill(240);
    frameRate(10);
    for(int iCloud=0; iCloud < 20; iCloud++){
          fill(random(220,255),random(150,255));
          rect(random(640),random(0,120),random(30,100),random(20,60),random(20,60));
      frameRate(5);

      }
  }
}
// generate window pattern

void drawWindows (float hBuilding) {

  for (float yWd=height-hBuilding;yWd<height;yWd +=20){
   for (float xWd=startPosition;xWd<mouseX;xWd +=20){
     point (xWd,yWd);
     }
    }

}

// draw building
void drawBuilding(float wBuilding, float hBuilding) {
  println(startPosition);
  fill(120);
  rect(startPosition,height-hBuilding, wBuilding, hBuilding);

// generate window pattern
  for (float yWd=height-hBuilding;yWd<height;yWd +=20){
   for (float xWd=startPosition;xWd<mouseX;xWd +=20){
     point (xWd,yWd);
     }
    }

}

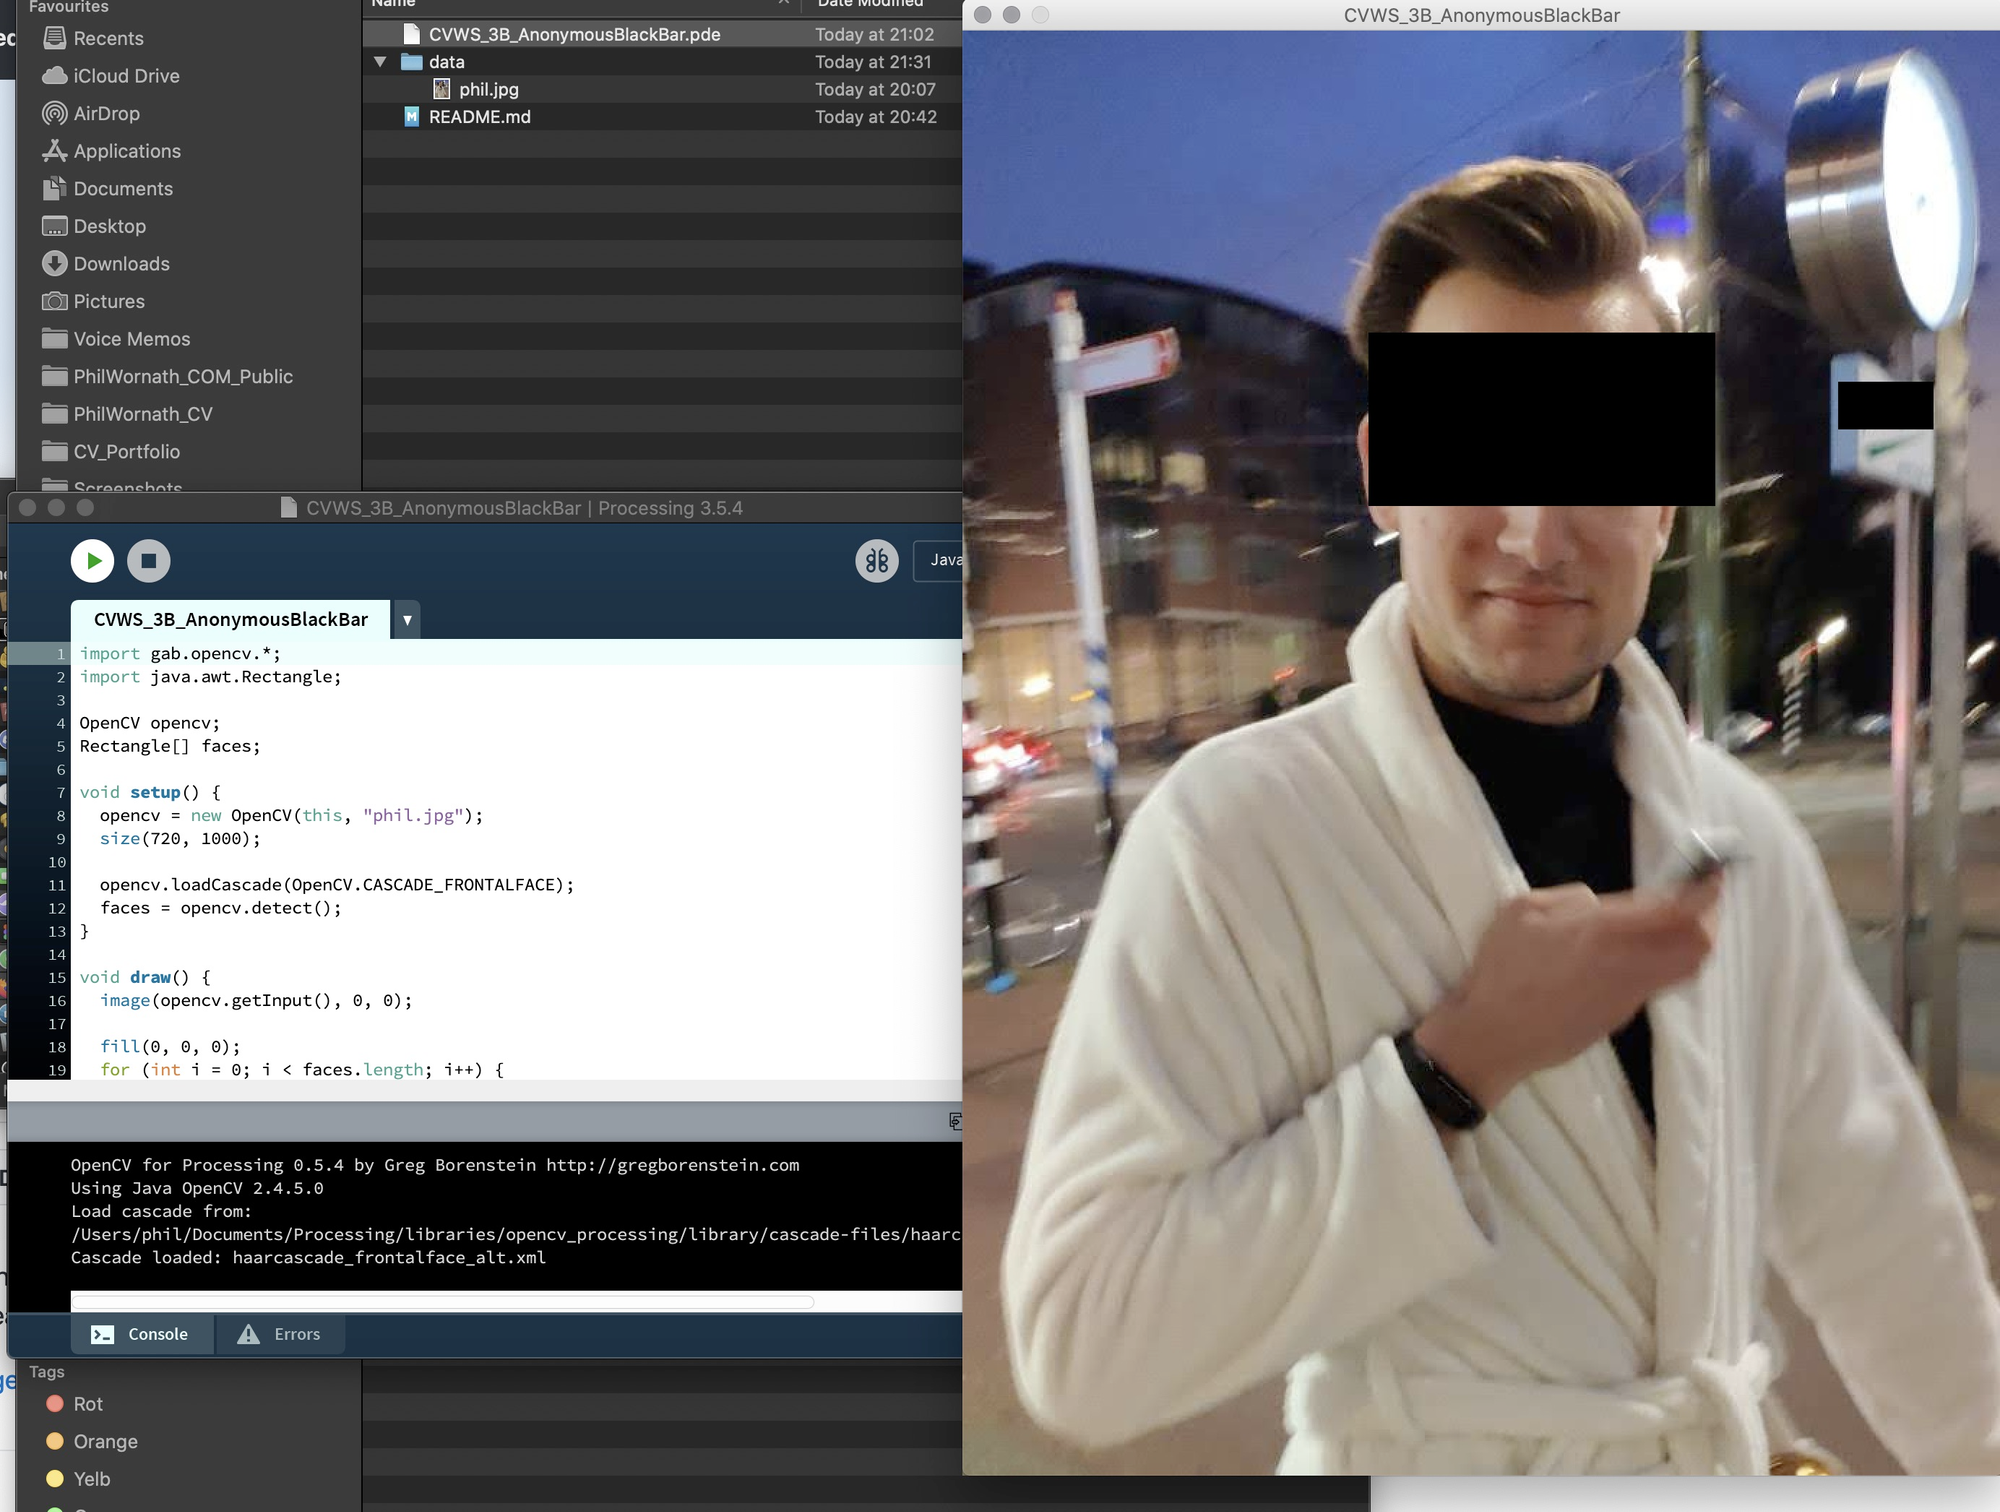
CVWS - 3B - AnonymousBlackBar
Change the code so that every recognised face gets an 'anonymous' black bar in front of his eyes or a red clown nose instead of his/her nose.
As I was facing the known trouble with macOS Catalina and OpenCV, The demand for improvisation was given.
Working code
import gab.opencv.*;
import java.awt.Rectangle;

OpenCV opencv;
Rectangle[] faces;

void setup() {
  opencv = new OpenCV(this, "phil.jpg");
  size(720, 1000);

  opencv.loadCascade(OpenCV.CASCADE_FRONTALFACE);
  faces = opencv.detect();
}

void draw() {
  image(opencv.getInput(), 0, 0);

  fill(0, 0, 0);
  for (int i = 0; i < faces.length; i++) {
    rect(faces[i].x, faces[i].y, faces[i].width, faces[i].height/2);
  }
}

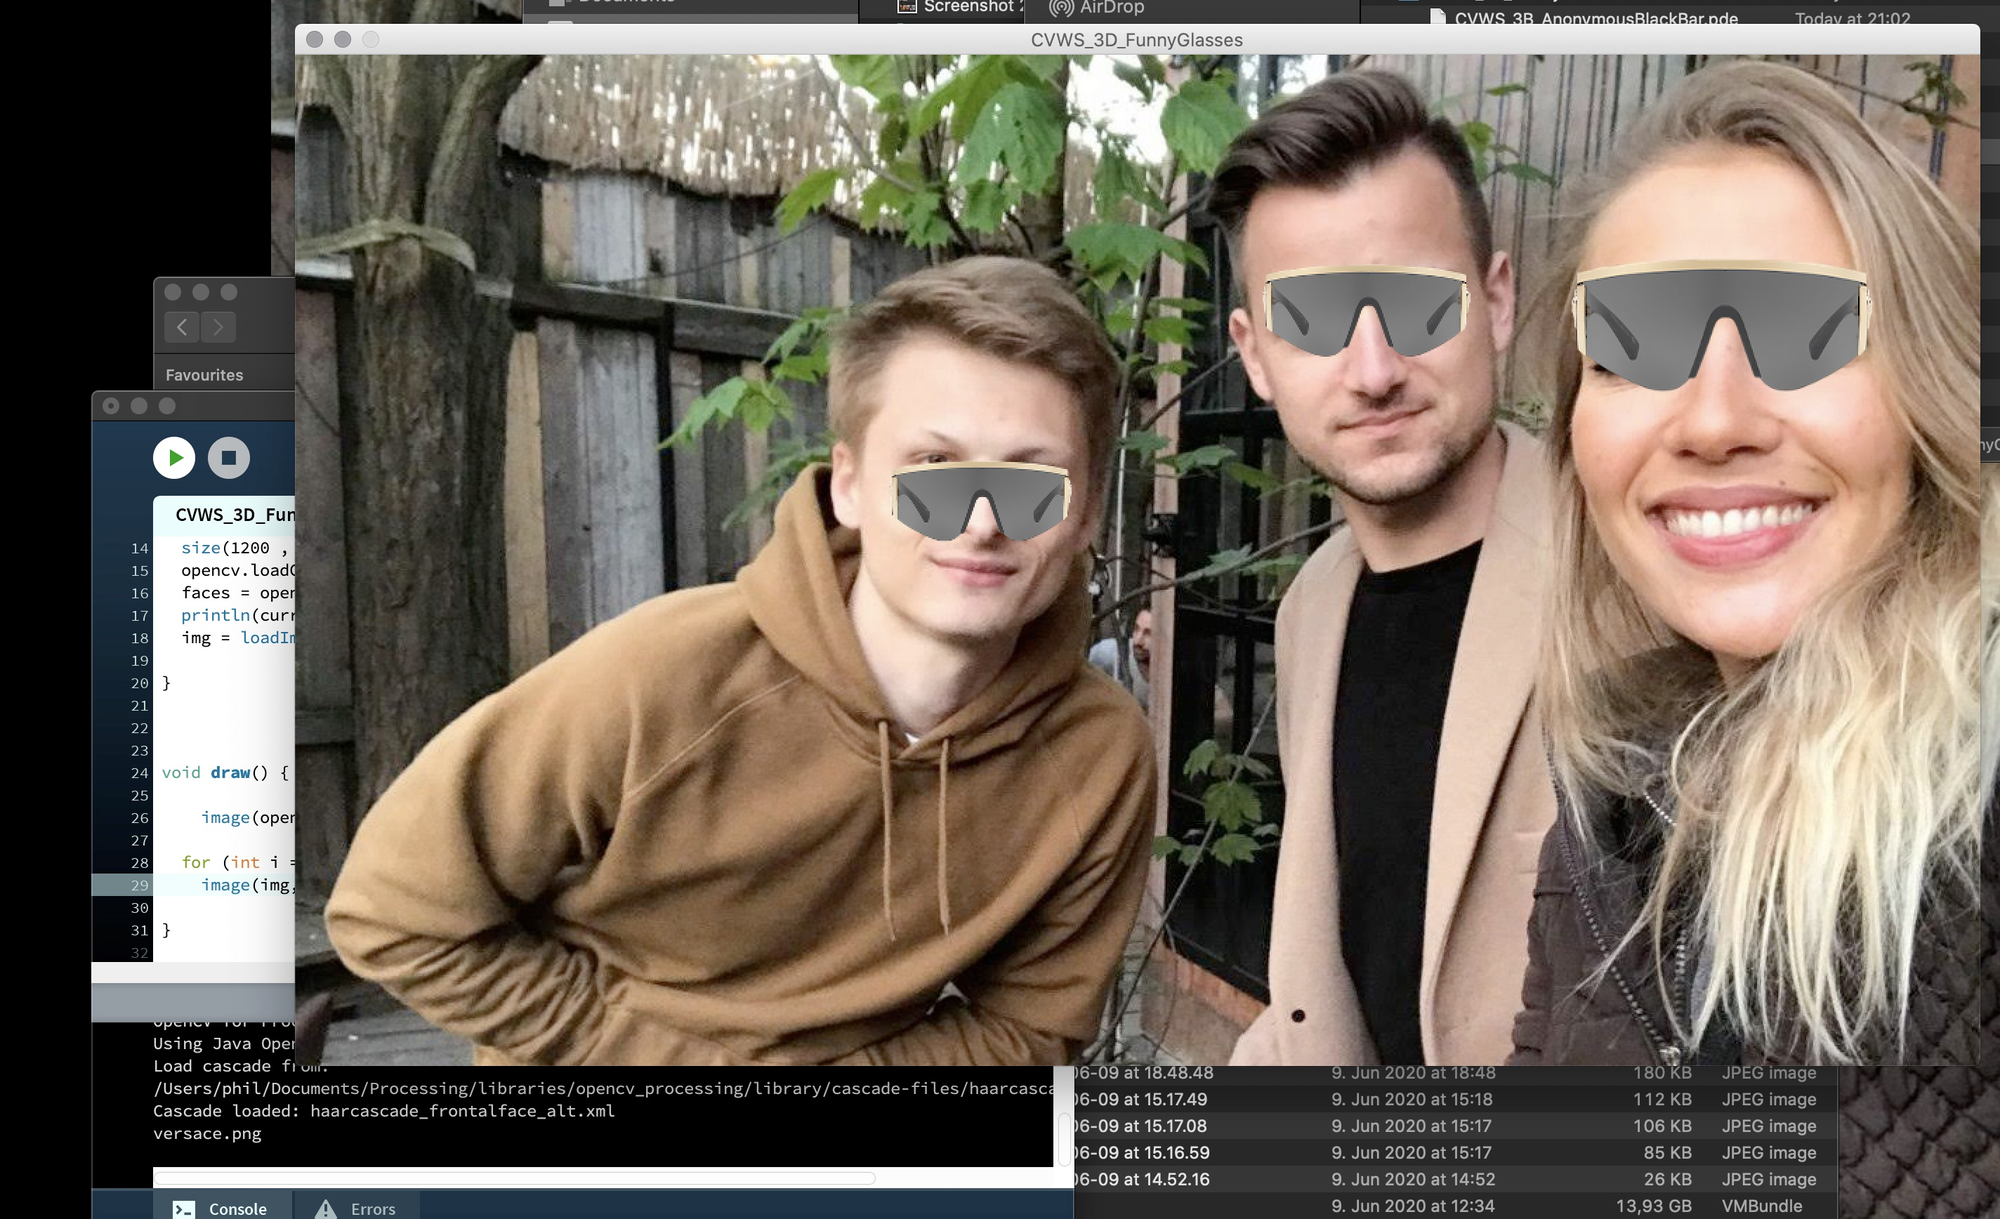
CVWS - 3D - FunnyGlasses
Write the code so that every recognised face is enhanced by an image, e.g. give a recognized face funny glasses or a hat..
Have a look at the documentation for the image() function for an example of how to display an image in Processing:
https://processing.org/reference/image_.html
With the given constraints, I decided to use the situation and do something I could not do with my webcam in corona times - bring my friends to the scene.
I was impressed, how reliable the detection worked - only by a few lines of code.
Working code
import gab.opencv.*;
import java.awt.Rectangle;

OpenCV opencv;
PImage img;
Rectangle[] faces;

String funnyGlassesFiles[] = split("dealwithit.png,versace.png,mafia.png", ',');
String currentGlasses = funnyGlassesFiles[(int)random(funnyGlassesFiles.length)];

void setup() {
  background(0);
  opencv = new OpenCV(this, "friends.jpg");
  size(1200 , 720);
  opencv.loadCascade(OpenCV.CASCADE_FRONTALFACE);
  faces = opencv.detect();
  println(currentGlasses);
  img = loadImage(currentGlasses);

}

void draw() {

    image(opencv.getInput(), 0, 0);

  for (int i = 0; i < faces.length; i++) {
    image(img, faces[i].x, faces[i].y*1.15,faces[i].width, faces[i].height/2);  }

}

CVWS - 4B - EmotionalPomodoroFlask
Make a new combination between Processing and Arduino. Use a different actuator on the Arduino side and something different from exercise 2A on the Processing side.
You can even experiment with the computer vision library and let something physical happen based on what the library recognizes.
In my ongoing challenge Challenge 3: Project MagicFlask I was facing the problem that I wanted to output values on an external device but not yet wanted to implement the final approach (ESP32 web sever / Web app or the Flutter App with BLE-connection, I wanted to make). Connecting the output of different flask states to Processing was a good way to test it. Side note here: The baud rate on ESP32 is different to the Arduino R3 model.
Working code
import processing.serial.*;
Serial myPort;
String sensorReading="";
PImage img;
String flasqImages[] = split("idleflasq.png,pomodoroflasq.png,sadflasq.png", ',');
String currentFlasq = "idleflasq.png";
String flasqStatus = "idle";
int t;
int interval = 310;
int timerStart, timerPomodoro;
String time = "010";

void setup() {
  size(400, 400);
  myPort = new Serial(this, Serial.list()[4], 115200);
  // Baud rate is different on ESP32
  myPort.bufferUntil('\n');
  img = loadImage(currentFlasq);
  timerStart=millis();
  println(timerStart);


}

  void draw() {

  background(48,52,55);
  image(img,100,100,img.height,img.width);

  fill(0,128,255);
  textSize(12);
    text("Sensor Reading: " + sensorReading, 20, 20);


 if(sensorReading.indexOf("start") >= 0){
        currentFlasq="pomodoroflasq.png";
        img = loadImage(currentFlasq);
        flasqStatus = "pomodoro";


  }else if(sensorReading.indexOf("stop") >= 0){
        currentFlasq="sadflasq.png";
        img = loadImage(currentFlasq);

  }else if (flasqStatus== "idle") {
          currentFlasq="idleflasq.png";
        img = loadImage(currentFlasq);


  }if (flasqStatus == "pomodoro") {
            fill(255);
          timerPomodoro =  millis() - timerStart;

          t = interval-int(timerPomodoro/1000);
          time = nf(t , 3);
          if(t == 0){
            println("POMODORO STOP");
          interval+=10;}
          textAlign(CENTER);
          textSize(32);
          text(time, width/2, 0.95*height);
       }else {


       }
  rectMode(CENTER);
  //rect(width/2, height/2, float(sensorReadingNeg*2), float(sensorReadingNeg), 9);
  textSize(32);
  fill(255, 255, 255);
  textAlign(CENTER);{

    }
  }
  void serialEvent (Serial myPort) { sensorReading = myPort.readStringUntil('\n');
}


